|
|
|
||||||||||||||||||||||||


Bigfoot's Burden Quest: mudanças entre as edições
| [edição aprovada] | [Aprovação Pendente] |
| Linha 12: | Linha 12: | ||
| location = [[Gnomebase]]<noinclude>, ({{mapa|32623,31863,11:5|acesso inicial aqui}}).</noinclude> | | location = [[Gnomebase]]<noinclude>, ({{mapa|32623,31863,11:5|acesso inicial aqui}}).</noinclude> | ||
| lvl = 80 | | lvl = 80 | ||
| dangers = [[Strange Slime]], [[Wyvern]]s, [[Crystalcrusher]]s, [[Earth Elemental]]s, [[Mushroom Sniffer]]s, [[Wiggler]]s, [[Massive Earth Elemental]]s, [[Enraged Crystal Golem]]s, [[Damaged Crystal Golem]]s, [[Mutated Rat]], [[Giant Spider]]s, [[Massive Fire Elemental]], [[Vulcongra]]s, [[Dragon Lord]]s, [[Armadile]]s, [[Cliff Strider]]s, [[Hideous Fungus]], [[Humongous Fungus]], [[Infected Weeper]], [[Ironblight]]s, [[Lava Golem]]s, [[Minion of Versperoth]], [[Lost Berserker]]s, [[Magma Crawler]]s, [[Orewalker]]s, [[Parasite]]s, [[Stone Devourer]]s, [[Weeper]]s | | dangers = [[Strange Slime]], [[Wyvern]]s, [[Crystalcrusher]]s, [[Earth Elemental]]s, [[Mushroom Sniffer]]s, [[Wiggler]]s, [[Massive Earth Elemental]]s, [[Enraged Crystal Golem]]s, [[Damaged Crystal Golem]]s, [[Mutated Rat]], [[Giant Spider]]s, [[Massive Fire Elemental]], [[Vulcongra]]s, [[Dragon Lord]]s, [[Armadile]]s, [[Cliff Strider]]s, [[Hideous Fungus]], [[Humongous Fungus]], [[Infected Weeper]], [[Ironblight]]s, [[Lava Golem]]s, [[Minion of Versperoth]], [[Lost Berserker]]s, [[Magma Crawler]]s, [[Orewalker]]s, [[Parasite]]s, [[Stone Devourer]]s, [[Weeper]]s.<br>'''Bosses:'''<br>[[Versperoth]], [[Abyssador]], [[Deathstrike]] e [[Gnomevil]]. | ||
| implemented = 9.6 | | implemented = 9.6 | ||
| legend = Os gnomos estão passando por tempos difíceis, e estão recrutando ajudantes. | | legend = Os gnomos estão passando por tempos difíceis, e estão recrutando ajudantes. | ||
| Linha 20: | Linha 20: | ||
| teamnote = Para a ultima missão | | teamnote = Para a ultima missão | ||
| dif = 3 | | dif = 3 | ||
| imgleg = | | imgleg = Large Blue Crystal1 | ||
| quests = [[Soil Guardian Outfits Quest]] [[Crystal Warlord Outfits Quest]] | | quests = [[Soil Guardian Outfits Quest]] [[Crystal Warlord Outfits Quest]] | ||
| spoiler = | | spoiler = | ||
__NOTOC__ | |||
= Requerimentos = | = Requerimentos = | ||
* Ser [[Level]] 80 para poder iniciar a quest. | * Ser [[Level]] 80 para poder iniciar a quest. | ||
| Linha 30: | Linha 30: | ||
'''Nota:''' [[Free Account]]s não podem acessar a [[Gnomebase Alpha]], por esse motivo, eles só podem fazer até as tasks do Rank II. A partir dai, uma premium é requerida. | '''Nota:''' [[Free Account]]s não podem acessar a [[Gnomebase Alpha]], por esse motivo, eles só podem fazer até as tasks do Rank II. A partir dai, uma premium é requerida. | ||
= | = Método = | ||
Para começar essa quest, você deve encontrar o [[NPC]] [[Xelvar]] ao norte do [[templo]] de [[Kazordoon]] e falar '''hi - join - yes'''. | Para começar essa quest, você deve encontrar o [[NPC]] [[Xelvar]] ao norte do [[templo]] de [[Kazordoon]] e falar '''hi - join - yes'''. | ||
[[Arquivo:Bigfoots Inicio NPC Xelvar.png]] | [[Arquivo:Bigfoots Inicio NPC Xelvar.png|300px]] | ||
Xelvar vai explicar que sugeriu aos gnomos contratarem pessoas para ajudá-los nos tempos difíceis, mas para que você possa entrar para a sociedade dos Gnomos, você precisará passar por um teste de recrutamento. Ele te dará 4 [[Teleport Crystal]]s, que servirão para usar os [[Large Blue Crystal]]s (teletransportes), e falará para você encontrar com [[Gnomerik]], no escritório de recrutamento.<br> | Xelvar vai explicar que sugeriu aos gnomos contratarem pessoas para ajudá-los nos tempos difíceis, mas para que você possa entrar para a sociedade dos Gnomos, você precisará passar por um teste de recrutamento. Ele te dará 4 [[Teleport Crystal]]s, que servirão para usar os [[Large Blue Crystal]]s (teletransportes), e falará para você encontrar com [[Gnomerik]], no escritório de recrutamento.<br> | ||
[[ | '''Nota:''' Você pode comprar mais [[Teleport Crystal]]s de [[Xelvar]] ([[Kazordoon]]), [[Gnomette]] ([[Gnomebase]]) e [[Gnomincia]] ([[Gnomebase Alpha]]). | ||
Use o teleporte ao leste de Xelvar e você sairá em um hub. Usando os [[Teleport Crystal]], você poderá ir e voltar através desse hub para: | |||
* [[Thais]], ({{mapa|32330,32173,9:4|aqui}}) | |||
* [[Edron]] ({{mapa|33152,31832,10:4|aqui}}) | |||
* [[Darashia]], ({{mapa|33185,32385,8:4|aqui}}) | |||
* [[Svargrond]], ({{mapa|32193,31184,8:4|aqui}}) | |||
* [[Liberty Bay]], ({{mapa|32402,32818,6:4|aqui}}) | |||
* [[Kazordoon]], ({{mapa|32625,31862,11:4|aqui}}) | |||
Vá ao centro do hub e desça uma escada que você vai encontrar. Agora siga ao noroeste e você estará no escritório de recrutamento. | |||
[[Arquivo:Bigfoots Hub Teleports.png]]<br> | [[Arquivo:Bigfoots Hub Teleports.png]]<br> | ||
| Linha 48: | Linha 54: | ||
'''Nota:''' Adicionalmente você pode pedir para [[Gnomette]], no centro do hub, para marcar o escritório no seu mapa falando '''hi - recruit - yes'''. | '''Nota:''' Adicionalmente você pode pedir para [[Gnomette]], no centro do hub, para marcar o escritório no seu mapa falando '''hi - recruit - yes'''. | ||
'''Xelvar''' | |||
{{transcrições|npc=Xelvar|texto= | {{transcrições|npc=Xelvar|texto= | ||
''Jogador'': '''join'''<br> | ''Jogador'': '''join'''<br> | ||
| Linha 58: | Linha 65: | ||
[[Xelvar]]: Good luck to you and don't embarrass your race down there! Keep in mind that you are a representative of the big people.}} | [[Xelvar]]: Good luck to you and don't embarrass your race down there! Keep in mind that you are a representative of the big people.}} | ||
=== Recruitment Office === | = [[Arquivo:Large Blue Crystal1.gif|link=]] Recruitment [[Arquivo:Large Blue Crystal1.gif|link=]] = | ||
<table class="abas"> | |||
<tr> | |||
<td class="mostrar-aba" style="width:33%; height:70px;" data-aba="1"> | |||
<table class="abas"> | |||
<tr> | |||
<td style="border-color:#1D262D; width:20%; height:70px;">[[Arquivo:Large Blue Crystal1.gif|right|link=]]</td> | |||
<td style="border-color:#1D262D; width:60%; height:70px;">1º Etapa: Recruitment Office</td> | |||
<td style="border-color:#1D262D; width:20%; height:70px;">[[Arquivo:Gnomerik.gif|50px|left|link=]]</td> | |||
</tr> | |||
</table> | |||
</td> | |||
<td class="mostrar-aba" style="width:33%; height:70px;" data-aba="2"> | |||
<table class="abas"> | |||
<tr> | |||
<td style="border-color:#1D262D; width:20%; height:70px;">[[Arquivo:Large Blue Crystal1.gif|right|link=]]</td> | |||
<td style="border-color:#1D262D; width:60%; height:70px;">2º Etapa: Medical Examination</td> | |||
<td style="border-color:#1D262D; width:20%; height:70px;">[[Arquivo:Gnomespector.gif|70px|left|link=]]</td> | |||
</tr> | |||
</table> | |||
</td> | |||
<td class="mostrar-aba" style="width:33%; height:70px;" data-aba="3"> | |||
<table class="abas"> | |||
<tr> | |||
<td style="border-color:#1D262D; width:20%; height:70px;">[[Arquivo:Large Blue Crystal1.gif|right|link=]]</td> | |||
<td style="border-color:#1D262D; width:60%; height:70px;">3º Etapa: Ear Examination</td> | |||
<td style="border-color:#1D262D; width:20%; height:70px;">[[Arquivo:Doctor Gnomedix.gif|82px|left|link=]]</td> | |||
</tr> | |||
</table> | |||
</td> | |||
</tr> | |||
<tr> | |||
<td class="mostrar-aba" style="width:33%; height:70px;" data-aba="4"> | |||
<table class="abas"> | |||
<tr> | |||
<td style="border-color:#1D262D; width:20%; height:70px;">[[Arquivo:Large Blue Crystal1.gif|right|link=]]</td> | |||
<td style="border-color:#1D262D; width:60%; height:70px;">4º Etapa: Shooting</td> | |||
<td style="border-color:#1D262D; width:20%; height:70px;">[[Arquivo:Gnomaticus.gif|60px|left|link=]]</td> | |||
</tr> | |||
</table> | |||
</td> | |||
<td class="mostrar-aba" style="width:33%; height:70px;" data-aba="5"> | |||
<table class="abas"> | |||
<tr> | |||
<td style="border-color:#1D262D; width:20%; height:70px;">[[Arquivo:Large Blue Crystal1.gif|right|link=]]</td> | |||
<td style="border-color:#1D262D; width:60%; height:70px;">5º Etapa: Endurance Test</td> | |||
<td style="border-color:#1D262D; width:20%; height:70px;">[[Arquivo:Gnomewart.gif|58px|left|link=]]</td> | |||
</tr> | |||
</table> | |||
</td> | |||
<td class="mostrar-aba" style="width:33%; height:70px;" data-aba="6"> | |||
<table class="abas"> | |||
<tr> | |||
<td style="border-color:#1D262D; width:20%; height:70px;">[[Arquivo:Large Blue Crystal1.gif|right|link=]]</td> | |||
<td style="border-color:#1D262D; width:60%; height:70px;">6º Etapa: Soul Melody</td> | |||
<td style="border-color:#1D262D; width:20%; height:70px;">[[Arquivo:Gnomelvis.gif|55px|left|link=]]</td> | |||
</tr> | |||
</table> | |||
</td> | |||
</tr> | |||
</table> | |||
<div id="aba-1" class="aba"> | |||
== [[Arquivo:Large Blue Crystal1.gif|link=]] Recruitment Office [[Arquivo:Large Blue Crystal1.gif|link=]] == | |||
Chegando no escritório, você encontrará [[Gnomerik]], aqui você começará o seu teste para ser um recruta.<br> | Chegando no escritório, você encontrará [[Gnomerik]], aqui você começará o seu teste para ser um recruta.<br> | ||
O primeiro teste que você precisa fazer, é um teste de perguntas e repostas onde você deve escolher uma das 4 alternativas. Para passar neste teste você precisa marcar ao menos 100 pontos.<br> | O primeiro teste que você precisa fazer, é um teste de perguntas e repostas onde você deve escolher uma das 4 alternativas. Para passar neste teste você precisa marcar ao menos 100 pontos.<br> | ||
[[Arquivo:Bigfoots NPC Gnomerik.png]] | |||
{{clear}} | |||
Fale com [[Gnomerik]] '''hi - recruitment - yes - test''', e ele começará o teste, para cada resposta que você der, você deverá falar "test" de novo. Caso você marque menos de 100, você precisará comprar e beber uma [[Fresh Mushroom Beer]] de [[Gnominus]], no norte da cidade.<br> | Fale com [[Gnomerik]] '''hi - recruitment - yes - test''', e ele começará o teste, para cada resposta que você der, você deverá falar "test" de novo. Caso você marque menos de 100, você precisará comprar e beber uma [[Fresh Mushroom Beer]] de [[Gnominus]], no norte da cidade.<br> | ||
'''Nota:''' Você deve tomar a bebida rápido, pois ela estraga em 20 segundos. Após tomar, você pode repetir o teste. | '''Nota:''' Você deve tomar a bebida rápido, pois ela estraga em 20 segundos. Após tomar, você pode repetir o teste. | ||
| Linha 68: | Linha 140: | ||
Com essas respostas, seu resultado será 112 e você passará no teste e poderá seguir para o próximo. | Com essas respostas, seu resultado será 112 e você passará no teste e poderá seguir para o próximo. | ||
'''Gnomerik''' | |||
{{transcrições|npc=Gnomerik|texto= | {{transcrições|npc=Gnomerik|texto= | ||
''Jogador'': '''Hi'''<br> | ''Jogador'': '''Hi'''<br> | ||
| Linha 168: | Linha 241: | ||
[[Gnomerik]]: You have failed the test with 91 of 112 possible points. You probably were just too nervous. ...<br> | [[Gnomerik]]: You have failed the test with 91 of 112 possible points. You probably were just too nervous. ...<br> | ||
I suggest you relax a bit with a fresh mushroom beer and we'll start over after that. Gnominus sells some beer. You should find him somewhere in the central chamber.}} | I suggest you relax a bit with a fresh mushroom beer and we'll start over after that. Gnominus sells some beer. You should find him somewhere in the central chamber.}} | ||
</div> | |||
=== Medical Examination === | <div id="aba-2" class="aba"> | ||
== [[Arquivo:Large Blue Crystal1.gif|link=]] Medical Examination [[Arquivo:Large Blue Crystal1.gif|link=]] == | |||
Passando no teste de [[Gnomerik]], você deverá seguir o caminho para o oeste até encontrar o [[Gnomespector]]. Com ele você fará a segunda parte do teste para recruta, o g-rays. Fale '''hi - recruit - yes''' e siga para o sul passando pelo caminho de piso verde (você se transformará em um [[Skeleton]] nessa parte). Pronto, você terminou aqui. | Passando no teste de [[Gnomerik]], você deverá seguir o caminho para o oeste até encontrar o [[Gnomespector]]. Com ele você fará a segunda parte do teste para recruta, o g-rays. Fale '''hi - recruit - yes''' e siga para o sul passando pelo caminho de piso verde (você se transformará em um [[Skeleton]] nessa parte). Pronto, você terminou aqui. | ||
'''Gnomespector''' | |||
{{transcrições|npc=Gnomespector|texto= | {{transcrições|npc=Gnomespector|texto= | ||
''Jogador'': '''hi''' <br> | ''Jogador'': '''hi''' <br> | ||
| Linha 183: | Linha 259: | ||
[[Arquivo:Bigfoots NPC Gnomespector Teste.png]] | [[Arquivo:Bigfoots NPC Gnomespector Teste.png]] | ||
</div> | |||
=== Ear Examination === | <div id="aba-3" class="aba"> | ||
== [[Arquivo:Large Blue Crystal1.gif|link=]] Ear Examination [[Arquivo:Large Blue Crystal1.gif|link=]] == | |||
Continue seguindo em frente e pare em um piso verde, no corredor ao lado do [[Doctor Gnomedix]]. Aqui você fará um exame nos ouvidos.<br> | Continue seguindo em frente e pare em um piso verde, no corredor ao lado do [[Doctor Gnomedix]]. Aqui você fará um exame nos ouvidos.<br> | ||
Quando você parar no piso verde, o [[NPC]] começará a examinar os seus ouvidos, '''fique parado''' até que um [[Strange Slime]] apareça na sua frente, quando isso acontecer, mate-o e você terá terminado essa parte do exame. | Quando você parar no piso verde, o [[NPC]] começará a examinar os seus ouvidos, '''fique parado''' até que um [[Strange Slime]] apareça na sua frente, quando isso acontecer, mate-o e você terá terminado essa parte do exame. | ||
[[Arquivo:Bigfoots Doctor Gnomedix Teste.png]] | [[Arquivo:Bigfoots Doctor Gnomedix Teste.png]] | ||
</div> | |||
=== Shooting === | <div id="aba-4" class="aba"> | ||
== [[Arquivo:Large Blue Crystal1.gif|link=]] Shooting [[Arquivo:Large Blue Crystal1.gif|link=]] == | |||
Continue seguindo para o sul até ver o [[Gnomaticus]], nessa parte do teste você deverá testar a sua pontaria em um jogo de tiro ao alvo. Fale '''hi - shooting - yes''' para o [[Gnomaticus]].<br> | Continue seguindo para o sul até ver o [[Gnomaticus]], nessa parte do teste você deverá testar a sua pontaria em um jogo de tiro ao alvo. Fale '''hi - shooting - yes''' para o [[Gnomaticus]].<br> | ||
Seu objetivo é acertar 5 vezes um [[Target Dummy]] [[Arquivo:Target Dummy.gif]], para isso, siga para o oeste do [[NPC]] e você verá um balcão com 3 [[Crystal Cannon]]s, se posicione em um deles e, aleatoriamente, 2 tipo de bonecos aparecerão na sua frente, lembre-se de usar os cannon somente nos pretos. | Seu objetivo é acertar 5 vezes um [[Target Dummy]] [[Arquivo:Target Dummy.gif]], para isso, siga para o oeste do [[NPC]] e você verá um balcão com 3 [[Crystal Cannon]]s, se posicione em um deles e, aleatoriamente, 2 tipo de bonecos aparecerão na sua frente, lembre-se de usar os cannon somente nos pretos. | ||
'''Gnomaticus''' | |||
{{transcrições|npc=Gnomaticus|texto= | {{transcrições|npc=Gnomaticus|texto= | ||
''Jogador'': '''hi''' <br> | ''Jogador'': '''hi''' <br> | ||
| Linha 210: | Linha 290: | ||
Caso você acerte o [[Innocent Target]] [[Arquivo:Innocent Target.gif]], você perderá um ponto (você precisa de 5). Após acertar 5 [[Target Dummy]] e conseguir os seus pontos, retorne para o [[Gnomaticus]] e diga '''hi - report - yes''' para entregar a sua missão. | Caso você acerte o [[Innocent Target]] [[Arquivo:Innocent Target.gif]], você perderá um ponto (você precisa de 5). Após acertar 5 [[Target Dummy]] e conseguir os seus pontos, retorne para o [[Gnomaticus]] e diga '''hi - report - yes''' para entregar a sua missão. | ||
'''Gnomaticus''' | |||
{{transcrições|npc=Gnomaticus|texto= | {{transcrições|npc=Gnomaticus|texto= | ||
''Jogador'': '''hi''' <br> | ''Jogador'': '''hi''' <br> | ||
| Linha 217: | Linha 297: | ||
''Jogador'': '''report''' <br> | ''Jogador'': '''report''' <br> | ||
[[Gnomaticus]]: You are showing some promise! Now continue with the recruitment and talk to Gnomewart to the south for your endurance test!}} | [[Gnomaticus]]: You are showing some promise! Now continue with the recruitment and talk to Gnomewart to the south for your endurance test!}} | ||
=== Endurance Test === | </div> | ||
<div id="aba-5" class="aba"> | |||
== [[Arquivo:Large Blue Crystal1.gif|link=]] Endurance Test [[Arquivo:Large Blue Crystal1.gif|link=]] == | |||
Agora siga para o sudoeste e você encontrará com [[Gnomewart]], diga '''hi - endurance'''. Seu objetivo aqui será apenas passar por um grande corredor.<br> | Agora siga para o sudoeste e você encontrará com [[Gnomewart]], diga '''hi - endurance'''. Seu objetivo aqui será apenas passar por um grande corredor.<br> | ||
| Linha 226: | Linha 309: | ||
Após conseguir, fale novamente com o [[Gnomewart]] '''hi - endurance''', ele mandará você encontrar o [[Gnomelvis]], que fica ao leste do [[Gnomewart]]. | Após conseguir, fale novamente com o [[Gnomewart]] '''hi - endurance''', ele mandará você encontrar o [[Gnomelvis]], que fica ao leste do [[Gnomewart]]. | ||
'''Gnomewart''' | |||
{{transcrições|npc=Gnomewart|texto= | {{transcrições|npc=Gnomewart|texto= | ||
''Jogador'': '''hi''' <br> | ''Jogador'': '''hi''' <br> | ||
| Linha 235: | Linha 318: | ||
[[Gnomewart]]: You'll need to run quite a bit. It is important that you don't give up! Just keep running and running and running and ... I guess you got the idea. ... <br> | [[Gnomewart]]: You'll need to run quite a bit. It is important that you don't give up! Just keep running and running and running and ... I guess you got the idea. ... <br> | ||
[[Gnomewart]]: At the end of the hallway you'll find a teleporter. Step on it and you are done! I'm sure you'll do a true gnomerun! Afterwards talk to me.}} | [[Gnomewart]]: At the end of the hallway you'll find a teleporter. Step on it and you are done! I'm sure you'll do a true gnomerun! Afterwards talk to me.}} | ||
{{transcrições|npc=Gnomewart|texto= | {{transcrições|npc=Gnomewart|texto= | ||
| Linha 242: | Linha 324: | ||
''Jogador'': '''endurance''' <br> | ''Jogador'': '''endurance''' <br> | ||
[[Gnomewart]]t: You have passed the test and are ready to create your soul melody. Talk to Gnomelvis in the east about it.}} | [[Gnomewart]]t: You have passed the test and are ready to create your soul melody. Talk to Gnomelvis in the east about it.}} | ||
</div> | |||
<div id="aba-6" class="aba"> | |||
=== Soul Melody === | == [[Arquivo:Large Blue Crystal1.gif|link=]] Soul Melody [[Arquivo:Large Blue Crystal1.gif|link=]] == | ||
Ok, chegamos na última fase do teste para se tornar um recruta. Agora que você achou o [[Gnomelvis]], diga '''hi - musical''', você terá que achar a combinação musical da sua ''Soul Melody'' com os cristais que emitem sons, ao todo existem 4 cristais. | Ok, chegamos na última fase do teste para se tornar um recruta. Agora que você achou o [[Gnomelvis]], diga '''hi - musical''', você terá que achar a combinação musical da sua ''Soul Melody'' com os cristais que emitem sons, ao todo existem 4 cristais. | ||
[[Arquivo:Bigfoots Soul Melody NPC Gnomelvis.png|450px]] | [[Arquivo:Bigfoots Soul Melody NPC Gnomelvis.png|450px]] | ||
'''Gnomelvis''' | |||
{{transcrições|npc=Gnomelvis|texto= | {{transcrições|npc=Gnomelvis|texto= | ||
''Jogador'': '''hi''' <br> | ''Jogador'': '''hi''' <br> | ||
| Linha 260: | Linha 342: | ||
[[Gnomelvis]]: So what you have to do is to find your soul melody. Do you see the huge crystals in this room? Those are harmonic crystals. Use them to deduce your soul melody. Simply use them to create a sound sequence. ...<br> | [[Gnomelvis]]: So what you have to do is to find your soul melody. Do you see the huge crystals in this room? Those are harmonic crystals. Use them to deduce your soul melody. Simply use them to create a sound sequence. ...<br> | ||
[[Gnomelvis]]: Every soul melody consists of seven sound sequences. You will have to figure out your correct soul melody by trial and error. If you hit a wrong note, you will have to start over.}} | [[Gnomelvis]]: Every soul melody consists of seven sound sequences. You will have to figure out your correct soul melody by trial and error. If you hit a wrong note, you will have to start over.}} | ||
A melodia consiste em 7 sons, então você deverá usar os cristais até que você acerte a sequência. A sequência varia de jogador para jogador. Sempre que você acertar um cristal, fogos sairão de você, se isso não acontecer, é porque você errou a ordem. | A melodia consiste em 7 sons, então você deverá usar os cristais até que você acerte a sequência. A sequência varia de jogador para jogador. Sempre que você acertar um cristal, fogos sairão de você, se isso não acontecer, é porque você errou a ordem. | ||
| Linha 269: | Linha 350: | ||
Após conseguir achar a combinação da sua Soul Melody, corações vão sair de você, fale novamente com o [[Gnomelvis]] '''hi - musical''', ele falará que você é um verdadeiro recruta da sociedade "Bigfoot" e que você deve encontrar com o [[Commander Stone]] para ajudá-lo com algumas tasks e marcará o seu mapa. | Após conseguir achar a combinação da sua Soul Melody, corações vão sair de você, fale novamente com o [[Gnomelvis]] '''hi - musical''', ele falará que você é um verdadeiro recruta da sociedade "Bigfoot" e que você deve encontrar com o [[Commander Stone]] para ajudá-lo com algumas tasks e marcará o seu mapa. | ||
'''Gnomelvis''' | |||
{{transcrições|npc=Gnomelvis|texto= | {{transcrições|npc=Gnomelvis|texto= | ||
''Jogador'': '''hi''' <br> | ''Jogador'': '''hi''' <br> | ||
| Linha 282: | Linha 364: | ||
{{DASH|[[Arquivo:Achievement.gif]] Após terminar o teste e virar um recruta, você ganhará o achievement '''"{{Achievement|Becoming A Bigfoot}}"'''.}} | {{DASH|[[Arquivo:Achievement.gif]] Após terminar o teste e virar um recruta, você ganhará o achievement '''"{{Achievement|Becoming A Bigfoot}}"'''.}} | ||
</div> | |||
= [[Arquivo:Large Blue Crystal1.gif|link=]] Gnome Reputation [[Arquivo:Large Blue Crystal1.gif|link=]] = | |||
= Gnome Reputation = | |||
Agora que você é um verdadeiro recruta, seu objetivo é ganhar mais reputação entre os Gnomos, você fará isso através de tasks que poderão ser repetidas a cada 20 horas. Cada task que você fizer, você ganhará algumas recompensas e 5 ou 10 de reputação. Quanto mais reputação você tiver, maior será o seu rank, e cada rank libera mais 2 tasks para você, além de acessos a outros locais. Os ranks são: | Agora que você é um verdadeiro recruta, seu objetivo é ganhar mais reputação entre os Gnomos, você fará isso através de tasks que poderão ser repetidas a cada 20 horas. Cada task que você fizer, você ganhará algumas recompensas e 5 ou 10 de reputação. Quanto mais reputação você tiver, maior será o seu rank, e cada rank libera mais 2 tasks para você, além de acessos a outros locais. Os ranks são: | ||
| Linha 315: | Linha 397: | ||
Além disso, no rank II você ganha acesso à [[Gnomebase Alpha]] e no rank IV às [[Warzones]], ambos requerem uma [[Premium Time]]. | Além disso, no rank II você ganha acesso à [[Gnomebase Alpha]] e no rank IV às [[Warzones]], ambos requerem uma [[Premium Time]]. | ||
== Rank 0 == | == [[Arquivo:Green Crystal Stalagmite.gif|link=]] Tasks - Rank 0 [[Arquivo:Green Crystal Stalagmite.gif|link=]] == | ||
=== Crystal Keeper === | |||
No início você ganhará duas tasks, veja abaixo. Estas tasks '''não requerem uma premium time'''. | |||
<table class="abas"> | |||
<tr> | |||
<td class="mostrar-aba" style="width:33%; height:70px;" data-aba="7"> | |||
<table class="abas"> | |||
<tr> | |||
<td style="border-color:#1D262D; width:25%; height:70px;">[[Arquivo:Large Blue Crystal1.gif|right|link=]]</td> | |||
<td style="border-color:#1D262D; width:50%; height:70px;">Crystal Keeper</td> | |||
<td style="border-color:#1D262D; width:25%; height:70px;">[[Arquivo:Large Crystal (Blue).gif|70px|left|link=]]</td> | |||
</tr> | |||
</table> | |||
</td> | |||
<td class="mostrar-aba" style="width:33%; height:70px;" data-aba="8"> | |||
<table class="abas"> | |||
<tr> | |||
<td style="border-color:#1D262D; width:25%; height:70px;">[[Arquivo:Large Blue Crystal1.gif|right|link=]]</td> | |||
<td style="border-color:#1D262D; width:50%; height:70px;">Raiders of the Lost Spark</td> | |||
<td style="border-color:#1D262D; width:25%; height:70px;">[[Arquivo:Crystal Crusher.gif|40px|left|link=]]</td> | |||
</tr> | |||
</table> | |||
</td> | |||
</tr> | |||
</table> | |||
<div id="aba-7" class="aba"> | |||
=== [[Arquivo:Large Blue Crystal1.gif|link=]] Crystal Keeper [[Arquivo:Large Blue Crystal1.gif|link=]] === | |||
[[Arquivo:Bigfoots Entrada Spark e Keeper.png|thumb|Entrada para task Keeper e Spark]] | [[Arquivo:Bigfoots Entrada Spark e Keeper.png|thumb|Entrada para task Keeper e Spark]] | ||
| Linha 341: | Linha 450: | ||
'''Nota:''' Se você perder o seu [[Gnomish Repair Crystal]] você pode comprar outro com a [[Gnomally]] por 50 [[gp]]s. | '''Nota:''' Se você perder o seu [[Gnomish Repair Crystal]] você pode comprar outro com a [[Gnomally]] por 50 [[gp]]s. | ||
''' | '''Crystal Keeper'''</br> | ||
{{transcrições|npc=Commander Stone|texto= | {{transcrições|npc=Commander Stone|texto= | ||
''Jogador'': '''hi'''<br> | ''Jogador'': '''hi'''<br> | ||
| Linha 378: | Linha 470: | ||
''Jogador'': '''keeper'''<br> | ''Jogador'': '''keeper'''<br> | ||
[[Commander Stone]]: You did well. That will help us a lot. Take your token and this gnomish supply package as a reward.}} | [[Commander Stone]]: You did well. That will help us a lot. Take your token and this gnomish supply package as a reward.}} | ||
</div> | |||
<div id="aba-8" class="aba"> | |||
=== [[Arquivo:Large Blue Crystal1.gif|link=]] Raiders of the Lost Spark [[Arquivo:Large Blue Crystal1.gif|link=]] === | |||
'''Nota:''' A Entrada para essa task é a mesma entrada da Keeper! | |||
'''Esteja preparado para enfrentar:''' [[Wyvern]]s, [[Earth Elemental]]s e [[Crystalcrusher]]s.<br> | |||
Fale novamente com o [[Commander Stone]] '''hi - mission - spark'''. Sua missão agora é extrair faíscas de energia de 7 [[Crystalcrusher]]s, para isso você receberá um [[Gnomish Extraction Crystal]].<br> | |||
Volte até a [[Crystal Grounds]], a mesma caverna da task anterior, e mate 7 [[Crystalcrusher]]s, espere alguns segundos e use o cristal no corpo da criatura. | |||
[[Arquivo:Bigfoot's Burden Quest7.jpg]] | |||
Após usar as 7 criaturas, volte e reporte sua missão ao [[Commander Stone]] falando '''hi - report - spark'''.<br> | |||
Você receberá 5 de reputação, 1 [[Minor Crystalline Token]] e 1 [[Gnomish Supply Package]].<br> | |||
{{DASH|[[Arquivo:Achievement.gif]] Fazendo essa task, você ganhará o achievement '''"{{Achievement|Call Me Sparky}}"'''.}} | |||
'''Nota:''' Se você perder o seu [[Gnomish Extraction Crystal]] você pode comprar outro com a [[Gnomally]] por 50 [[gp]]s. | |||
'''Raiders of the Lost Spark'''</br> | |||
{{transcrições|npc=Commander Stone|texto= | {{transcrições|npc=Commander Stone|texto= | ||
''Jogador'': '''hi'''<br> | ''Jogador'': '''hi'''<br> | ||
| Linha 398: | Linha 510: | ||
''Jogador'': '''spark'''<br> | ''Jogador'': '''spark'''<br> | ||
[[Commander Stone]]: You did well. That will help us a lot. Take your token and this gnomish supply package as a reward.}} | [[Commander Stone]]: You did well. That will help us a lot. Take your token and this gnomish supply package as a reward.}} | ||
</div> | |||
== [[Arquivo:Green Crystal Stalagmite.gif|link=]] Tasks - Rank I [[Arquivo:Green Crystal Stalagmite.gif|link=]] == | |||
Quando você alcançar o rank I (30 de reputação) você ganhará duas novas tasks, veja abaixo. Estas tasks '''não requerem uma premium time'''. | |||
<table class="abas"> | |||
<tr> | |||
<td class="mostrar-aba" style="width:33%; height:70px;" data-aba="9"> | |||
<table class="abas"> | |||
<tr> | |||
<td style="border-color:#1D262D; width:25%; height:70px;">[[Arquivo:Large Blue Crystal1.gif|right|link=]]</td> | |||
<td style="border-color:#1D262D; width:50%; height:70px;">Extermination</td> | |||
<td style="border-color:#1D262D; width:25%; height:70px;">[[Arquivo:Wiggler.gif|28px|left|link=]]</td> | |||
</tr> | |||
</table> | |||
</td> | |||
<td class="mostrar-aba" style="width:33%; height:70px;" data-aba="10"> | |||
<table class="abas"> | |||
<tr> | |||
<td style="border-color:#1D262D; width:25%; height:70px;">[[Arquivo:Large Blue Crystal1.gif|right|link=]]</td> | |||
<td style="border-color:#1D262D; width:50%; height:70px;">Mushroom Digging</td> | |||
<td style="border-color:#1D262D; width:25%; height:70px;">[[Arquivo:Pig.gif|48px|left|link=]]</td> | |||
</tr> | |||
</table> | |||
</td> | |||
</tr> | |||
</table> | |||
== | <div id="aba-9" class="aba"> | ||
=== Extermination === | === [[Arquivo:Large Blue Crystal1.gif|link=]] Extermination [[Arquivo:Large Blue Crystal1.gif|link=]] === | ||
[[Arquivo:Bigfoots Entrada Extermination Digging.png|thumb|Entrada para task Extermination e Digging]] | [[Arquivo:Bigfoots Entrada Extermination Digging.png|thumb|Entrada para task Extermination e Digging]] | ||
| Linha 416: | Linha 555: | ||
{{DASH|[[Arquivo:Achievement.gif]] Fazendo essa task, você ganhará o achievement '''"{{Achievement|One Foot Vs. Many}}"'''.}} | {{DASH|[[Arquivo:Achievement.gif]] Fazendo essa task, você ganhará o achievement '''"{{Achievement|One Foot Vs. Many}}"'''.}} | ||
- | |||
=== Mushroom Digging === | '''Mushroom Digging'''</br> | ||
{{transcrições|npc=Commander Stone|texto= | |||
''Jogador'': '''hi'''<br> | |||
[[Commander Stone]]: Hello recruit.<br> | |||
''Jogador'': '''mission'''<br> | |||
[[Commander Stone]]: For your rank are four missions available: crystal keeper, spark hunting, monster extermination and mushroom digging. By the way, you rank now allows you to take aditional missions from Gnomeral in Gnomebase Alpha. ...<br> | |||
[[Commander Stone]]: You can undertake each mission but you can turn in a specific mission only once each 20 hours. If you lose a mission item you can probably buy it from Gnomally.<br> | |||
''Jogador'': '''digging'''<br> | |||
[[Commander Stone]]: Take this little piggy here. It will one day become a great mushroom hunter for sure. For now it is depended on you and other pigs. ... | |||
[[Commander Stone]]: Well other pigs then itself of course. I was not comparing you with a pig of course! Go to the truffels area and follow the truffel pigs there. When they dig up some truffels let the little pig eat the mushrooms. ...<br> | |||
[[Commander Stone]]: You'll have to feed it three times. Then return it to me. ... | |||
[[Commander Stone]]: Keep in mind that the pig has to be returned to his mother after a while. When you don't do it, the gnomes will recall it via teleport cryrstals.}} | |||
''Entregando a missão.'' | |||
{{transcrições|npc=Commander Stone|texto= | |||
''Jogador'': '''hi'''<br> | |||
[[Commander Stone]]: Hello recruit.<br> | |||
''Jogador'': '''report'''<br> | |||
[[Commander Stone]]: Which mission do you want to report: crystal keeper, spark hunting, extermination or mushroom digging?<br> | |||
''Jogador'': '''digging'''<br> | |||
[[Commander Stone]]: You did well. That will help us a lot. Take your token and this gnomish supply package as a reward.}} | |||
</div> | |||
<div id="aba-10" class="aba"> | |||
=== [[Arquivo:Large Blue Crystal1.gif|link=]] Mushroom Digging [[Arquivo:Large Blue Crystal1.gif|link=]] === | |||
'''Nota:''' A Entrada para essa task é a mesma entrada da Extermination! | '''Nota:''' A Entrada para essa task é a mesma entrada da Extermination! | ||
| Linha 428: | Linha 592: | ||
[[Arquivo:Bigfoot's Burden Quest8.jpg]] | [[Arquivo:Bigfoot's Burden Quest8.jpg]] | ||
Quando o [[Mushroom Sniffer]] passar por cima desse chão, ele vai "cavar" e vai aparecer [[Mold Floor (Truffels)|bolinhas vermelhas]], isso são os mushrooms, use o seu [[Little Pig]] nelas. É aconselhável a matar os mushroom sniffers se eles estiverem com a vida baixa, já que eles ficam fugindo, atrapalhando o jogador de fazer a task da quest. | Quando o [[Mushroom Sniffer]] passar por cima desse chão, ele vai "cavar" e vai aparecer [[Mold Floor (Truffels)|bolinhas vermelhas]], isso são os mushrooms, use o seu [[Little Pig]] nelas. É aconselhável a matar os mushroom sniffers se eles estiverem com a vida baixa, já que eles ficam fugindo, atrapalhando o jogador de fazer a task da quest.</br> | ||
'''Nota:''' Aleatoriamente pode não aparecer os mushrooms, neste caso você deve esperar o [[Mold Floor (Hollow)|Mold Floor]] voltar ao normal e tentar novamente. | '''Nota:''' Aleatoriamente pode não aparecer os mushrooms, neste caso você deve esperar o [[Mold Floor (Hollow)|Mold Floor]] voltar ao normal e tentar novamente. | ||
| Linha 442: | Linha 605: | ||
'''Nota:''' Lembre-se que o [[Little Pig]] dura somente uma hora, caso esse tempo termine, você pode comprar outro [[Little Pig]] de [[Gnomally]] por 150 [[gp]]s. | '''Nota:''' Lembre-se que o [[Little Pig]] dura somente uma hora, caso esse tempo termine, você pode comprar outro [[Little Pig]] de [[Gnomally]] por 150 [[gp]]s. | ||
'''Extermination'''</br> | |||
{{transcrições|npc=Commander Stone|texto= | {{transcrições|npc=Commander Stone|texto= | ||
''Jogador'': '''hi'''<br> | ''Jogador'': '''hi'''<br> | ||
| Linha 461: | Linha 624: | ||
''Jogador'': '''keeper'''<br> | ''Jogador'': '''keeper'''<br> | ||
[[Commander Stone]]: You did well. That will help us a lot. Take your token and this gnomish supply package as a reward.}} | [[Commander Stone]]: You did well. That will help us a lot. Take your token and this gnomish supply package as a reward.}} | ||
</div> | |||
== | == [[Arquivo:Green Crystal Stalagmite.gif|link=]] Tasks - Rank II [[Arquivo:Green Crystal Stalagmite.gif|link=]] == | ||
[[ | |||
[[ | |||
'''A partir de agora você precisará de uma premium time'''.<br> | '''A partir de agora você precisará de uma premium time'''.<br> | ||
Quando você alcançar o rank II (120 de reputação) você ganhará duas novas tasks, veja abaixo. | Quando você alcançar o rank II (120 de reputação) você ganhará duas novas tasks, veja abaixo. | ||
=== Matchmaker === | <table class="abas"> | ||
<tr> | |||
<td class="mostrar-aba" style="width:33%; height:70px;" data-aba="11"> | |||
<table class="abas"> | |||
<tr> | |||
<td style="border-color:#1D262D; width:25%; height:70px;">[[Arquivo:Large Blue Crystal1.gif|right|link=]]</td> | |||
<td style="border-color:#1D262D; width:50%; height:70px;">Matchmaker</td> | |||
<td style="border-color:#1D262D; width:25%; height:70px;">[[Arquivo:Large Crystal (Red).gif|52px|left|link=]]</td> | |||
</tr> | |||
</table> | |||
</td> | |||
<td class="mostrar-aba" style="width:33%; height:70px;" data-aba="12"> | |||
<table class="abas"> | |||
<tr> | |||
<td style="border-color:#1D262D; width:25%; height:70px;">[[Arquivo:Large Blue Crystal1.gif|right|link=]]</td> | |||
<td style="border-color:#1D262D; width:50%; height:70px;">The Tinker's Bell</td> | |||
<td style="border-color:#1D262D; width:25%; height:70px;">[[Arquivo:Enraged Crystal Golem.gif|52px|left|link=]]</td> | |||
</tr> | |||
</table> | |||
</td> | |||
</tr> | |||
</table> | |||
<div id="aba-11" class="aba"> | |||
=== [[Arquivo:Large Blue Crystal1.gif|link=]] Matchmaker [[Arquivo:Large Blue Crystal1.gif|link=]] === | |||
'''Nota:''' A entrada para essa task é a mesma da Keeper e Spark, mas o NPC está localizado na [[Gnomebase Alpha]]. | '''Nota:''' A entrada para essa task é a mesma da Keeper e Spark, mas o NPC está localizado na [[Gnomebase Alpha]]. | ||
| Linha 522: | Linha 687: | ||
Quando conseguir, volte para o [[Gnomeral]] na [[Gnomebase Alpha]] e report sua missão dizendo '''hi - report - matchmaker'''.<br> | Quando conseguir, volte para o [[Gnomeral]] na [[Gnomebase Alpha]] e report sua missão dizendo '''hi - report - matchmaker'''.<br> | ||
Você receberá 10 de reputação, 2 [[Minor Crystalline Token]]s e 1 [[Gnomish Supply Package]]. | Você receberá 10 de reputação, 2 [[Minor Crystalline Token]]s e 1 [[Gnomish Supply Package]]. | ||
'''Matchmaker'''</br> | |||
{{transcrições|npc=Gnomeral|texto= | {{transcrições|npc=Gnomeral|texto= | ||
''Jogador'': '''hi'''<br> | ''Jogador'': '''hi'''<br> | ||
| Linha 563: | Linha 708: | ||
''Jogador'': '''matchmaker'''<br> | ''Jogador'': '''matchmaker'''<br> | ||
[[Gnomeral]]: Gnomo arigato ''Jogador''! You did well. That will help us a lot. Take this gnomish supply package as a reward.}} | [[Gnomeral]]: Gnomo arigato ''Jogador''! You did well. That will help us a lot. Take this gnomish supply package as a reward.}} | ||
</div> | |||
<div id="aba-12" class="aba"> | |||
=== [[Arquivo:Large Blue Crystal1.gif|link=]] The Tinker's Bell [[Arquivo:Large Blue Crystal1.gif|link=]] === | |||
'''Esteja preparado para enfrentar:''' [[Damaged Crystal Golem]]s e [[Enraged Crystal Golem]]s.<br> | |||
Para a próxima tarefa, volte para o [[Gnomeral]] na [[Gnomebase Alpha]] e fale '''hi - mission - repair'''. Ele dirá que os Crystal Golems as vezes enlouquecem, e que um recente terremoto abalou toda a produção de uma fábrica de golems. Por esse motivo, ele te dará um [[Bell]] e pedirá para você recuperar alguns desses Crystal Golems. | |||
Vá para o sul do [[Gnomeral]] e siga tudo para o leste até ver um placa escrito "Mission Teleporter Golem Workshop". | |||
[[Arquivo:Bigfoots Entrada Repair.png]] | |||
Entre no teleporte que estará um pouco ao sul dessa placa. Aqui você já poderá ver os golems, lá em baixo existem dois tipos de golems, os [[Enraged Crystal Golem]]s e os [[Damaged Crystal Golem]]s. Seu dever é encontrar 4 Damageds e usar os [[Bell]] neles, os Damageds ficarão correndo de você, por isso é recomendado que você mate todos os Enrageds para você não ficar trapado. | |||
[[Arquivo:Bigfoot's Burden Quest12.jpg]] | |||
Após usar o [[Bell]] em 4 [[Damaged Crystal Golem]]s, retorne ao [[Gnomeral]] e report sua missão dizendo '''hi - report - repair'''.<br> | |||
Você receberá 5 de reputação, 2 [[Minor Crystalline Token]]s e 1 [[Gnomish Supply Package]].<br> | |||
{{DASH|[[Arquivo:Achievement.gif]] Ao reportar essa task, você também ganhará o achievement '''"{{Achievement|Substitute Tinker}}"'''.}} | |||
'''Nota:''' Se você perder o seu [[Bell]] você pode comprar outro com a [[Gnomally]] por 50 [[gp]]s. | |||
'''The Tinker's Bell'''</br> | |||
{{transcrições|npc=Gnomeral|texto= | {{transcrições|npc=Gnomeral|texto= | ||
''Jogador'': '''hi'''<br> | ''Jogador'': '''hi'''<br> | ||
| Linha 585: | Linha 753: | ||
''Jogador'': '''repair'''<br> | ''Jogador'': '''repair'''<br> | ||
[[Gnomeral]]: Gnomo arigato ''Jogador''! You did well. That will help us a lot. Take your tokens and this gnomish supply package as a reward.}} | [[Gnomeral]]: Gnomo arigato ''Jogador''! You did well. That will help us a lot. Take your tokens and this gnomish supply package as a reward.}} | ||
</div> | |||
== Rank III == | == [[Arquivo:Green Crystal Stalagmite.gif|link=]] Tasks - Rank III [[Arquivo:Green Crystal Stalagmite.gif|link=]] == | ||
Quando você alcançar o rank III (480 de reputação) você ganhará duas novas tasks, veja abaixo. | Quando você alcançar o rank III (480 de reputação) você ganhará duas novas tasks, veja abaixo. | ||
=== Spores === | <table class="abas"> | ||
<tr> | |||
<td class="mostrar-aba" style="width:33%; height:70px;" data-aba="13"> | |||
<table class="abas"> | |||
<tr> | |||
<td style="border-color:#1D262D; width:25%; height:70px;">[[Arquivo:Large Blue Crystal1.gif|right|link=]]</td> | |||
<td style="border-color:#1D262D; width:50%; height:70px;">Spores</td> | |||
<td style="border-color:#1D262D; width:25%; height:70px;">[[Arquivo:Giant Spider.gif|60px|left|link=]]</td> | |||
</tr> | |||
</table> | |||
</td> | |||
<td class="mostrar-aba" style="width:33%; height:70px;" data-aba="14"> | |||
<table class="abas"> | |||
<tr> | |||
<td style="border-color:#1D262D; width:25%; height:70px;">[[Arquivo:Large Blue Crystal1.gif|right|link=]]</td> | |||
<td style="border-color:#1D262D; width:50%; height:70px;">Yet Another Grinding</td> | |||
<td style="border-color:#1D262D; width:25%; height:70px;">[[Arquivo:Vulcongra.gif|52px|left|link=]]</td> | |||
</tr> | |||
</table> | |||
</td> | |||
</tr> | |||
</table> | |||
<div id="aba-13" class="aba"> | |||
=== [[Arquivo:Large Blue Crystal1.gif|link=]] Spores [[Arquivo:Large Blue Crystal1.gif|link=]] === | |||
'''Esteja preparado para enfrentar:''' [[Mutated Rat]]s, [[Wyvern]]s, [[Massive Earth Elemental]]s, [[Giant Spider]]s, [[Wiggler]]s, [[Crystalcrusher]]s e [[Crystal Spider]]s (dependendo de até onde você for).<br> | '''Esteja preparado para enfrentar:''' [[Mutated Rat]]s, [[Wyvern]]s, [[Massive Earth Elemental]]s, [[Giant Spider]]s, [[Wiggler]]s, [[Crystalcrusher]]s e [[Crystal Spider]]s (dependendo de até onde você for).<br> | ||
| Linha 610: | Linha 803: | ||
'''Nota2:''' Você pode coletar esporos em quantos [[Gnomish Spore Gatherer]] quiser, simultaneamente. Porém, só pode entregar a task uma vez ao dia. Isso é útil se quiser deixar sua task pronta pros próximos dias, ou ajudar alguém a fazê-la. | '''Nota2:''' Você pode coletar esporos em quantos [[Gnomish Spore Gatherer]] quiser, simultaneamente. Porém, só pode entregar a task uma vez ao dia. Isso é útil se quiser deixar sua task pronta pros próximos dias, ou ajudar alguém a fazê-la. | ||
'''Spores'''</br> | |||
{{transcrições|npc=Gnomeral|texto= | {{transcrições|npc=Gnomeral|texto= | ||
''Jogador'': '''hi'''<br> | ''Jogador'': '''hi'''<br> | ||
| Linha 649: | Linha 825: | ||
''Jogador'': '''spore'''<br> | ''Jogador'': '''spore'''<br> | ||
[[Gnomeral]]: Gnomo arigato ''Jogador''! You did well. That will help us a lot. Take your tokens and this gnomish supply package as a reward.}} | [[Gnomeral]]: Gnomo arigato ''Jogador''! You did well. That will help us a lot. Take your tokens and this gnomish supply package as a reward.}} | ||
<</div> | |||
<div id="aba-14" class="aba"> | |||
=== [[Arquivo:Large Blue Crystal1.gif|link=]] Yet Another Grinding [[Arquivo:Large Blue Crystal1.gif|link=]] === | |||
'''Esteja preparado para enfrentar:''' [[Dragon Lord]]s, [[Vulcongra]]s, [[Massive Fire Elemental]]s.<br> | |||
Volte ao [[Gnomeral]] e diga '''hi - mission - grindstone'''. Ele dirá que os Gnomos precisam de algumas pedras especiais para cortar e polir cristais. O problema é que elas só podem ser encontradas no [[Hot Spot]] e é muito perigoso. Seu dever será ir até lá e pegar para ele. | |||
Vá para o sul de [[Gnomeral]] e entre no teleporte do [[Hot Spot]]. Você terá que ter sorte nessa missão, em vários locais dessa área existem rios de lava, na maioria desses rios existem [[Strange Stones]] ou [[Whetstones]], seu dever é usar as [[Whetstones]] para pegar um [[Whetstone]], se você não conseguir no primeiro, vai tentando até conseguir. Se você só encontrar [[Strange Stones]], você deve esperar algum tempo para que ele vire as [[Whetstones]]. | |||
[[Arquivo:Bigfoot's Burden Quest15.png]] | |||
[[Arquivo:Whetstone.JPG]] | |||
Quando você conseguir a [[Whetstone]], você tem até uma hora para entregá-las ao [[Gnomeral]], por isso, volte até ele e reporte sua missão dizendo '''hi - report - grindstone'''.<br> | |||
{{DASH|[[Arquivo:Achievement.gif]] Ao finalizar a task você receberá o achievement '''"{{Achievement|Grinding Again}}"'''.}} | |||
Você receberá 10 de reputação, 2 [[Minor Crystalline Token]]s e 1 [[Gnomish Supply Package]]. | |||
'''Yet Another Grinding'''</br> | |||
{{transcrições|npc=Gnomeral|texto= | {{transcrições|npc=Gnomeral|texto= | ||
''Jogador'': '''hi'''<br> | ''Jogador'': '''hi'''<br> | ||
| Linha 669: | Linha 865: | ||
''Jogador'': '''grindstone'''<br> | ''Jogador'': '''grindstone'''<br> | ||
[[Gnomeral]]: Gnomo arigato ''Jogador''! You did well. That will help us a lot. Take your tokens and this gnomish supply package as a reward.}} | [[Gnomeral]]: Gnomo arigato ''Jogador''! You did well. That will help us a lot. Take your tokens and this gnomish supply package as a reward.}} | ||
</div> | |||
== [[Arquivo:Green Crystal Stalagmite.gif|link=]] Tasks - Rank IV [[Arquivo:Green Crystal Stalagmite.gif|link=]] == | |||
== Rank IV == | |||
Agora que você chegou ao rank IV, você precisará de muitos suprimentos e um ótimo time para continuar. Lembre-se que todos os jogadores do seu time devem estar no rank IV e na respectiva warzone.<br> | Agora que você chegou ao rank IV, você precisará de muitos suprimentos e um ótimo time para continuar. Lembre-se que todos os jogadores do seu time devem estar no rank IV e na respectiva warzone.<br> | ||
Devido a grande dificuldade dessas missões, é recomendado que o seu time tenha cerca de 20 pessoas em torno do level 200+.<br> | Devido a grande dificuldade dessas missões, é recomendado que o seu time tenha cerca de 20 pessoas em torno do level 200+.<br> | ||
{{DASH|:'''Nota 1: Para entrar em cada Warzone é necessário 1 Red Teleport Crystal. Você pode adquirir acesso vitalício às três warzones ao entregar os itens dos bosses para o NPC Gnomission porém ele só irá aceitar o item do boss da warzone depois que você completar e resgatar as recompensas da mesma warzone.'''</br> | |||
''' | |||
:'''Exemplo:''' Você só poderá entregar o Deathstrike's Snippet se completar a Warzone I e resgatar a recompensa logo em seguida. | |||
:'''Nota 2: Em sua primeira vez, você deve fazer as warzones em ordem crescente e estar dentro da sala do boss quando ele for derrotado, isso quer dizer que se você sair da sala do boss antes que o time o derrote, você terá que repetir a warzone novamente após 20 horas para ir para próxima.'''</br> | |||
:'''Exemplo:''' Se você estiver fazendo a Warzone I e sair da sala do boss Deathstrike antes que ele seja derrotado, você conseguirá resgatar a recompensa caso tenha causado algum dano ao boss e também poderá entregar o item Deathstrike's Snippet ao NPC Gnomission porém não conseguirá acessar a Warzone II mesmo que tenha um Red Teleport Crystal.}} | |||
<big><big>'''Acessando as Warzones sem Red Teleport Crystal'''</big></big></br> | |||
Você pode acessar as Warzones sem ter que usar um [[Red Teleport Crystal]], para isso você precisa entregar o Creature Item de cada boss ao NPC [[Gnomission]], perguntando por '''HEROES'''.<br> | |||
Os itens são: [[Deathstrike's Snippet]] para a [[Warzone 1]], [[Gnomevil's Hat]] para a [[Warzone 2]] e [[Abyssador's Lash]] para a [[Warzone 3]]. Você pode dropar os itens ou simplesmente comprar de outro jogador. | |||
{{Infobox Item/List/Header|Itens dos Bosses }} | |||
{{:Deathstrike's Snippet|List}} | |||
{{:Gnomevil's Hat|List}} | |||
{{:Abyssador's Lash|List}} | |||
{{DASH|[[Arquivo:Achievement.gif]] Após entregar os três Boss Itens, você ganhará o achievement '''"{{Achievement|Gnomish Art of War}}"'''.}}}} | |||
<big><big>'''Warzones'''</big></big></br> | |||
<table class="abas"> | |||
<tr> | |||
<td class="mostrar-aba" style="width:33%; height:70px;" data-aba="WZ1"> | |||
<table class="abas"> | |||
<tr> | |||
<td style="border-color:#1D262D; width:20%; height:70px;">[[Arquivo:Large Blue Crystal1.gif|right|link=]]</td> | |||
<td style="border-color:#1D262D; width:60%; height:70px;">Warzone I</td> | |||
<td style="border-color:#1D262D; width:20%; height:70px;">[[Arquivo:Deathstrike.gif|left|link=]]</td> | |||
</tr> | |||
</table> | |||
</td> | |||
<td class="mostrar-aba" style="width:33%; height:70px;" data-aba="WZ2"> | |||
<table class="abas"> | |||
<tr> | |||
<td style="border-color:#1D262D; width:20%; height:70px;">[[Arquivo:Large Blue Crystal1.gif|right|link=]]</td> | |||
<td style="border-color:#1D262D; width:60%; height:70px;">Warzone II</td> | |||
<td style="border-color:#1D262D; width:20%; height:70px;">[[Arquivo:Gnomevil.gif|left|link=]]</td> | |||
</tr> | |||
</table> | |||
</td> | |||
<td class="mostrar-aba" style="width:33%; height:70px;" data-aba="WZ3"> | |||
<table class="abas"> | |||
<tr> | |||
<td style="border-color:#1D262D; width:20%; height:70px;">[[Arquivo:Large Blue Crystal1.gif|right|link=]]</td> | |||
<td style="border-color:#1D262D; width:60%; height:70px;">Warzone III</td> | |||
<td style="border-color:#1D262D; width:20%; height:70px;">[[Arquivo:Abyssador.gif|left|link=]]</td> | |||
</tr> | |||
</table> | |||
</td> | |||
</tr> | |||
</table> | |||
<div id="aba-WZ1" class="aba"> | |||
=== [[Arquivo:Large Blue Crystal1.gif|link=]] Warzone I [[Arquivo:Large Blue Crystal1.gif|link=]] === | |||
Antes de começar com essa missão, cada membro do time precisará de um [[Red Teleport Crystal]]. Após isso, vá para a [[Gnomebase Alpha]] e siga para o leste e sul, até encontrar o [[Gnomission]], diga '''hi - mission - yes'''.<br> | Antes de começar com essa missão, cada membro do time precisará de um [[Red Teleport Crystal]]. Após isso, vá para a [[Gnomebase Alpha]] e siga para o leste e sul, até encontrar o [[Gnomission]], diga '''hi - mission - yes'''.<br> | ||
Siga para o norte do NPC até encontrar o teleport para a warzone I. | Siga para o norte do NPC até encontrar o teleport para a warzone I. | ||
| Linha 685: | Linha 932: | ||
[[Arquivo:Bigfoot's Burden Quest16.png]] | [[Arquivo:Bigfoot's Burden Quest16.png]] | ||
Passando o teleporte, você sairá em uma sala com o [[Gnomad]] e um outro teleporte, o [[Gnomad]] pode te dar algumas táticas para você conseguir terminar a wazone 1, basta falar '''hi - tactical'''. Passe pelo outro teleporte, é recomendado que os [[knight]]s passem primeiro, pois do outro lado já tem criaturas. | Passando o teleporte, você sairá em uma sala com o [[Gnomad]] e um outro teleporte, o [[Gnomad]] pode te dar algumas táticas para você conseguir terminar a wazone 1, basta falar '''hi - tactical'''. Passe pelo outro teleporte, é recomendado que os [[knight]]s passem primeiro, pois do outro lado já tem criaturas. | ||
'''Esteja preparado para enfrentar:'''<br> | |||
{{Template:Infobox Criatura/List/Header|Criaturas}} | |||
{{:Armadile|List}} | |||
{{:Hideous Fungus|List}} | |||
{{:Humongous Fungus|List}} | |||
{{:Stone Devourer|List}} | |||
{{Template:Infobox Criatura/List/Header|Boss}} | |||
{{:Deathstrike|List}} | |||
Chegando no destino, você encontrará um [[Green Crystal Stalagmite]] '''NÃO USE O CRISTAL'''. Posicione todo o time a direita do cristal, se você estiver jogando em Optional-PvP, é recomendado dar stack. Agora, use o cristal uma vez. Quando você usar, | Siga o mapa abaixo para chegar até o teleporte do boss: | ||
[[Arquivo:Bigfoot's Burden Quest17.png|300px]] | |||
Chegando no destino, você encontrará um [[Green Crystal Stalagmite]] '''NÃO USE O CRISTAL'''. Posicione todo o time a direita do cristal, se você estiver jogando em Optional-PvP, é recomendado dar stack. Agora, use o cristal uma vez. Quando você usar, invasões de [[Humongous Fungus]] e [[Hideous Fungus]] irão começar, ao todo são 6 invasões. Você não precisa matar todos, mas deve aguentar até que um portal apareça no canto.<br> | |||
'''Nota:''' Se você for de Optional-PvP e todos estiverem em stack, você pode jogar [[Magic Wall]]s cercando o grupo para evitar que todas as criaturas fiquem atacando vocês. | '''Nota:''' Se você for de Optional-PvP e todos estiverem em stack, você pode jogar [[Magic Wall]]s cercando o grupo para evitar que todas as criaturas fiquem atacando vocês. | ||
| Linha 696: | Linha 955: | ||
O portal demorará 3 minutos para aparecer, quando ele aparecer todos devem entrar no teleport.<br> | O portal demorará 3 minutos para aparecer, quando ele aparecer todos devem entrar no teleport.<br> | ||
'''Nota:''' Vocês têm 30 segundos para entrar no teleport. | '''Nota:''' Vocês têm 30 segundos para entrar no teleport. | ||
<big><big>'''Deathstrike'''</big></big>[[Arquivo:Deathstrike.gif]]</br> | |||
Passando pelo teleport, o boss nascerá em alguns segundos. É recomendado que você bloqueie o boss no canto, com [[Wild Growth]]s ou então que vários knights fiquem ao redor (se tiver knights suficientes). Os shooters devem ter cuidado com as magias de área do boss, e de preferência ficar na diagonal. Agora, mate o boss o mais rápido possível.<br> | |||
'''Nota:''' Se o time não conseguir, todos podem sair por um teleporte ao sudeste da sala.<br> | |||
[[Arquivo:Bigfoot's Burden Quest30.PNG]] | [[Arquivo:Bigfoot's Burden Quest30.PNG]] | ||
Se você conseguir matar o boss, saia pelo teleporte ao sudeste e volte até o teleporte da Warzone I, mas não entre, continue seguindo para o norte até ver o [[Deathstrike Treasure Chest]], use-o para receber sua recompensa.<br> | |||
Você receberá: | |||
* 2 [[Major Crystalline Token]]s [[Arquivo:Major Crystalline Token.gif]] | |||
* 1 [[Gill Necklace]] [[Arquivo:Gill Necklace.gif]] | |||
* 1 [[Mucus Plug]] [[Arquivo:Mucus Plug.gif]] | |||
* 7 [[Green Crystal Shard]]s [[Arquivo:Green Crystal Shard.gif]] | |||
* 3 [[Crystal Coin]]s [[Arquivo:Crystal Coin.gif]] | |||
e há a possibilidade de vir aleatoriamente um dos seguintes itens: | |||
* 1 [[Head of Deathstrike]] [[Arquivo:Head of Deathstrike.gif]] | |||
* 1 [[Torso of Deathstrike]] [[Arquivo:Torso of Deathstrike.gif]] | |||
* 1 [[Legs of Deathstrike]] [[Arquivo:Legs of Deathstrike.gif]] | |||
* 1 [[Miniature House]] [[Arquivo:Miniature House.gif]].<br> | |||
{{DASH|:[[Arquivo:Achievement.gif]] Após usar o baú de recompensas, você ganhará o achievement '''"{{Achievement|Final Strike}}"'''. | {{DASH|:[[Arquivo:Achievement.gif]] Após usar o baú de recompensas, você ganhará o achievement '''"{{Achievement|Final Strike}}"'''. | ||
| Linha 710: | Linha 983: | ||
'''Nota:''' Se você quiser fazer novamente ou se você '''entrou no teleport do boss''' mas por algum motivo não o matou, você deve esperar 20 horas reais para repetir. | '''Nota:''' Se você quiser fazer novamente ou se você '''entrou no teleport do boss''' mas por algum motivo não o matou, você deve esperar 20 horas reais para repetir. | ||
</div> | |||
=== | <div id="aba-WZ2" class="aba"> | ||
=== [[Arquivo:Large Blue Crystal1.gif|link=]] Warzone II [[Arquivo:Large Blue Crystal1.gif|link=]] === | |||
Após terminar a warzone I você conseguirá entrar no segundo teleporte localizado na imagem abaixo.<br> | Após terminar a warzone I você conseguirá entrar no segundo teleporte localizado na imagem abaixo.<br> | ||
'''Nota:''' Para entrar na warzone II você vai precisar de 1 [[Red Teleport Crystal]]. | '''Nota:''' Para entrar na warzone II você vai precisar de 1 [[Red Teleport Crystal]]. | ||
| Linha 719: | Linha 992: | ||
[[Arquivo:Bigfoot's Burden Quest20.png]] | [[Arquivo:Bigfoot's Burden Quest20.png]] | ||
Entrando na warzone II você encontrará o [[Gnomole]] e um outro teleporte, o [[Gnomole]] pode te dar algumas táticas para você conseguir terminar a wazone 2, basta falar '''hi - tactical'''.<br> | Entrando na warzone II você encontrará o [[Gnomole]] e um outro teleporte, o [[Gnomole]] pode te dar algumas táticas para você conseguir terminar a wazone 2, basta falar '''hi - tactical'''.</br> | ||
Os beam de quase todas as criaturas dessa warzone causam mais de 800 danos (é recomendado ficar na diagonal), organize bem o seu grupo para que as criaturas não virem nos shooters. O objetivo dessa warzone é similar ao da primeira, você deve chegar até o teleporte que fica no final da warzone. | Os beam de quase todas as criaturas dessa warzone causam mais de 800 danos (é recomendado ficar na diagonal), organize bem o seu grupo para que as criaturas não virem nos shooters. O objetivo dessa warzone é similar ao da primeira, você deve chegar até o teleporte que fica no final da warzone.</br> | ||
[[Arquivo:Bigfoot's Burden Quest19.png]]</br> | |||
'''Esteja preparado para enfrentar:'''<br> | |||
{{Template:Infobox Criatura/List/Header|Criaturas}} | |||
{{:Infected Weeper|List}} | |||
{{:Lava Golem|List}} | |||
{{:Lost Berserker|List}} | |||
{{:Magma Crawler|List}} | |||
{{:Weeper|List}} | |||
{{Template:Infobox Criatura/List/Header|Boss}} | |||
{{:Gnomevil|List}} | |||
Mate todas as criaturas do caminho até chegar em uma parede de cristal que protege o teleporte para o próximo [[Gnomevil|boss]], quando chegar até a parede os knights do seu grupo devem voltar um pouco para encontrar o [[Infected Weeper]], '''NÃO MATE ELE'''.<br> | Mate todas as criaturas do caminho até chegar em uma parede de cristal que protege o teleporte para o próximo [[Gnomevil|boss]], quando chegar até a parede os knights do seu grupo devem voltar um pouco para encontrar o [[Infected Weeper]], '''NÃO MATE ELE'''.<br> | ||
Lure o [[Infected Weeper]] até a parede de cristal, trape ele com alguns knights de forma que tenha espaço em volta do [[Infected Weeper]] para que ele possa sumonar [[Parasite]]s, você deve matar os parasites ''na frente da parede de cristal'' para que a parede diminua cada vez mais, até que ela suma completamente (4 parasites) e seu time possa entrar no teleporte e enfrentar o | Lure o [[Infected Weeper]] até a parede de cristal, trape ele com alguns knights de forma que tenha espaço em volta do [[Infected Weeper]] para que ele possa sumonar [[Parasite]]s, você deve matar os parasites ''na frente da parede de cristal'' para que a parede diminua cada vez mais, até que ela suma completamente (4 parasites) e seu time possa entrar no teleporte e enfrentar o boss (vocês têm 30 segundos para entrar). | ||
[[Arquivo:Bigfoot's Burden Quest27.png]] | [[Arquivo:Bigfoot's Burden Quest27.png]] | ||
<big><big>'''Gnomevil'''</big></big> [[Arquivo:Gnomevil.gif]]</br> | |||
Esse boss é o poderoso [[Gnomevil]] ele pode não parecer ameaçador, mas tome cuidado, procure lurar o boss para o canto e trape ele com alguns knights ou algumas [[Wild Growth Rune]]s, os shooters têm que atacar com o que tiverem de mais forte pois o boss tem muita vida e um poder de cura muito constante. | |||
Um grupo mínimo de 9 jogadores seria ideal para enfrentá-lo (''3 [[Blocker]]s, 1 [[Druid|Healer]] e 5 [[Shooter]]s''). A partir do momento que o primeiro jogador entrar na sala, a equipe terá 30 minutos para derrotá-lo, após isso todos serão | Um grupo mínimo de 9 jogadores seria ideal para enfrentá-lo (''3 [[Blocker]]s, 1 [[Druid|Healer]] e 5 [[Shooter]]s''). A partir do momento que o primeiro jogador entrar na sala, a equipe terá 30 minutos para derrotá-lo, após isso todos serão teleportados para fora da sala. | ||
'''Estratégia:''' | '''Estratégia:''' | ||
*Ao entrar na sala, dirijam-se para um dos cantos. Em mundos [[Optional PvP]] façam um [[Stacking|stack]] no canto, em mundos [[Open PvP]] fiquem todos na parede. | * Ao entrar na sala, dirijam-se para um dos cantos. Em mundos [[Optional PvP]] façam um [[Stacking|stack]] no canto, em mundos [[Open PvP]] fiquem todos na parede. | ||
*Quando o [[Gnomevil]] atacar alguém, os blockers devem cercá-lo, o [[Druid|Healer]] deve ficar próximo o suficiente para usar [[Mass Healing]], enquanto os [[Shooter]]s ficam atacando a distância. | * Quando o [[Gnomevil]] atacar alguém, os blockers devem cercá-lo, o [[Druid|Healer]] deve ficar próximo o suficiente para usar [[Mass Healing]], enquanto os [[Shooter]]s ficam atacando a distância. | ||
*É recomendado que os [[mage]]s usem [[Sudden Death Rune]]s e [[Paladin]]s usem [[Crystal Arrow]]/[[Prismatic Bolt]]s | * É recomendado que os [[mage]]s usem [[Sudden Death Rune]]s e [[Paladin]]s usem [[Crystal Arrow]]/[[Prismatic Bolt]]s</br> | ||
'''Nota:''' Se o time não conseguir, todos podem sair por um teleporte ao sudeste da sala. | |||
Se você conseguir matar o boss, saia pelo teleporte ao sudeste e volte até o teleporte da Warzone II, e use o [[Gnomevil Treasure Chest]] para receber sua recompensa.<br> | Se você conseguir matar o boss, saia pelo teleporte ao sudeste e volte até o teleporte da Warzone II, e use o [[Gnomevil Treasure Chest]] para receber sua recompensa.<br> | ||
Você receberá: 2 [[Major Crystalline Token]]s | Você receberá: | ||
* 2 [[Major Crystalline Token]]s [[Arquivo:Major Crystalline Token.gif]] | |||
* 1 [[Prismatic Necklace]] [[Arquivo:Prismatic Necklace.gif]] | |||
* 1 [[Mucus Plug]] [[Arquivo:Mucus Plug.gif]] | |||
* 10 [[Blue Crystal Shard]]s [[Arquivo:Blue Crystal Shard.gif]] | |||
* 4 [[Crystal Coin]]s [[Arquivo:Crystal Coin.gif]] | |||
e há a possibilidade de vir aleatoriamente um dos seguintes itens: | |||
* 1 [[Head of Gnomevil]] [[Arquivo:Head of Gnomevil.gif]] | |||
* 1 [[Torso of Gnomevil]] [[Arquivo:Torso of Gnomevil.gif]] | |||
* 1 [[Legs of Gnomevil]] [[Arquivo:Legs of Gnomevil.gif]] | |||
* 1 [[Miniature House]] [[Arquivo:Miniature House.gif]].<br> | |||
{{DASH|:[[Arquivo:Achievement.gif]] Após usar o baú de recompensas, você ganhará o achievement '''"{{Achievement|Gnomebane's Bane}}"'''. | {{DASH|:[[Arquivo:Achievement.gif]] Após usar o baú de recompensas, você ganhará o achievement '''"{{Achievement|Gnomebane's Bane}}"'''. | ||
| Linha 748: | Linha 1 046: | ||
'''Nota:''' Se você quiser fazer novamente ou se você '''entrou no teleport do boss''' mas por algum motivo não o matou, você deve esperar 20 horas reais para repetir. | '''Nota:''' Se você quiser fazer novamente ou se você '''entrou no teleport do boss''' mas por algum motivo não o matou, você deve esperar 20 horas reais para repetir. | ||
</div> | |||
=== | <div id="aba-WZ3" class="aba"> | ||
=== [[Arquivo:Large Blue Crystal1.gif|link=]] Warzone III [[Arquivo:Large Blue Crystal1.gif|link=]] === | |||
Após terminar a warzone II, você terá acesso ao terceiro teleporte localizado na imagem abaixo.<br> | Após terminar a warzone II, você terá acesso ao terceiro teleporte localizado na imagem abaixo.<br> | ||
'''Nota:''' Para entrar na warzone III você vai precisar de 1 [[Red Teleport Crystal]]. | '''Nota:''' Para entrar na warzone III você vai precisar de 1 [[Red Teleport Crystal]]. | ||
| Linha 760: | Linha 1 058: | ||
[[Arquivo:Bigfoot's Burden Quest24.png]] | [[Arquivo:Bigfoot's Burden Quest24.png]] | ||
'''Esteja preparado para enfrentar:'''<br> | |||
{{Template:Infobox Criatura/List/Header|Criaturas}} | |||
{{:Cliff Strider|List}} | |||
{{:Ironblight|List}} | |||
{{:Lost Berserker|List}} | |||
{{:Orewalker|List}} | |||
{{Template:Infobox Criatura/List/Header|Bosses}} | |||
{{:Minion of Versperoth|List}} | |||
{{:Versperoth|List}} | |||
{{:Abyssador|List}} | |||
<big><big>'''Versperoth'''</big></big> [[Arquivo:Versperoth.gif]]</br> | |||
'''TOME CUIDADO''', ao chegar no final do caminho, você encontrará os boss [[Versperoth]] e vários [[Minion of Versperoth|Minions of Versperoth]]. Não adianta ficar matando os [[Minion of Versperoth|Minions of Versperoths]] pois eles ficam aparecendo cada vez mais, por isso, a melhor tática aqui é os [[Knight]]s correrem para matar os boss, junto com alguns shooters, enquanto os leveis mais baixo e os outros shooters ficam na entrada matando os [[Lava Golem]]s, os shooters podem se fechar com [[Wild Growth Rune]]s. | '''TOME CUIDADO''', ao chegar no final do caminho, você encontrará os boss [[Versperoth]] e vários [[Minion of Versperoth|Minions of Versperoth]]. Não adianta ficar matando os [[Minion of Versperoth|Minions of Versperoths]] pois eles ficam aparecendo cada vez mais, por isso, a melhor tática aqui é os [[Knight]]s correrem para matar os boss, junto com alguns shooters, enquanto os leveis mais baixo e os outros shooters ficam na entrada matando os [[Lava Golem]]s, os shooters podem se fechar com [[Wild Growth Rune]]s. | ||
| Linha 766: | Linha 1 078: | ||
Mate o boss o mais rápido possível, se ele sumir é só esperar um tempo que ele voltará. Quando o [[Versperoth]] for morto, um teleport irá aparecer e todos do time devem entrar, vocês têm 30 segundos para isso. | Mate o boss o mais rápido possível, se ele sumir é só esperar um tempo que ele voltará. Quando o [[Versperoth]] for morto, um teleport irá aparecer e todos do time devem entrar, vocês têm 30 segundos para isso. | ||
<big><big>'''Abyssador'''</big></big> [[Arquivo:Abyssador.gif]]</br> | |||
Após entrar no teleporte você estará dentro da sala do [[Abyssador]], para matar esse boss é necessário um time de aproximadamente 40 pessoas, pois ele heala bastante.<br> | Após entrar no teleporte você estará dentro da sala do [[Abyssador]], para matar esse boss é necessário um time de aproximadamente 40 pessoas, pois ele heala bastante.<br> | ||
| Linha 779: | Linha 1 093: | ||
Se você conseguir matar o boss, saia pelo teleporte ao leste e volte até o teleporte da Warzone III, e use o [[Abyssador Treasure Chest]] para receber sua recompensa.<br> | Se você conseguir matar o boss, saia pelo teleporte ao leste e volte até o teleporte da Warzone III, e use o [[Abyssador Treasure Chest]] para receber sua recompensa.<br> | ||
Você receberá: 2 [[Major Crystalline Token]]s | Você receberá: | ||
* 2 [[Major Crystalline Token]]s [[Arquivo:Major Crystalline Token.gif]] | |||
* 1 [[Prismatic Ring]] [[Arquivo:Prismatic Ring.gif]] | |||
* 1 [[Mucus Plug]] [[Arquivo:Mucus Plug.gif]] | |||
* 12 [[Violet Crystal Shard]]s [[Arquivo:Violet Crystal Shard.gif]] | |||
* 5 [[Crystal Coin]]s [[Arquivo:Crystal Coin.gif]] | |||
e há a possibilidade de vir aleatoriamente um dos seguintes itens: | |||
* 1 [[Head of Abyssador]] [[Arquivo:Head of Abyssador.gif]] | |||
* 1 [[Torso of Abyssador]] [[Arquivo:Torso of Abyssador.gif]] | |||
* 1 [[Tail of Abyssador]] [[Arquivo:Tail of Abyssador.gif]] | |||
* 1 [[Miniature House]] [[Arquivo:Miniature House.gif]].<br> | |||
{{DASH|:[[Arquivo:Achievement.gif]] Após usar o baú de recompensas, você ganhará o achievement '''"{{Achievement|Death from Below}}"'''. | {{DASH|:[[Arquivo:Achievement.gif]] Após usar o baú de recompensas, você ganhará o achievement '''"{{Achievement|Death from Below}}"'''. | ||
| Linha 785: | Linha 1 110: | ||
'''Nota:''' Se você quiser fazer novamente ou se você '''entrou no teleport do boss''' mas por algum motivo não o matou, você deve esperar 20 horas reais para repetir. | '''Nota:''' Se você quiser fazer novamente ou se você '''entrou no teleport do boss''' mas por algum motivo não o matou, você deve esperar 20 horas reais para repetir. | ||
</div> | |||
<big><big>'''Completando as 3 Warzones'''</big></big></br> | |||
{{DASH|[[Arquivo:Achievement.gif]] Após completar as três, você ganhará o achievement '''"{{Achievement|Dungeon Cleaner}}"'''.}} | {{DASH|[[Arquivo:Achievement.gif]] Após completar as três, você ganhará o achievement '''"{{Achievement|Dungeon Cleaner}}"'''.}} | ||
Após derrotar os 3 [[bosses]] nas [[Warzones]], será permitido passar na porta ao lado do banco na [[gnomebase]] e pegar a recompensa: o [[Some Golden Fruits]]. | Após derrotar os 3 [[bosses]] nas [[Warzones]], será permitido passar na porta ao lado do banco na [[gnomebase]] e pegar a recompensa: o [[Some Golden Fruits]]. | ||
<big><big>'''Negociando com Gnomission'''</big></big></br> | |||
Após matar 20 bosses (não precisa ser o mesmo), você poderá vender itens para o [[Gnomission]]. | Após matar 20 bosses (não precisa ser o mesmo), você poderá vender itens para o [[Gnomission]]. | ||
'''Nota:''' Os bosses que contam aqui são: [[Deathstrike]], [[Gnomevil]] e [[Abyssador]]. | '''Nota:''' Os bosses que contam aqui são: [[Deathstrike]], [[Gnomevil]] e [[Abyssador]]. | ||


Edição das 22h33min de 23 de julho de 2020
Veja também: Quests | Soil Guardian Outfits Quest Crystal Warlord Outfits Quest.
Requerimentos
- Ser Level 80 para poder iniciar a quest.
- Ser premium para ter acesso as outras tasks.
Nota: Free Accounts não podem acessar a Gnomebase Alpha, por esse motivo, eles só podem fazer até as tasks do Rank II. A partir dai, uma premium é requerida.
Método
Para começar essa quest, você deve encontrar o NPC Xelvar ao norte do templo de Kazordoon e falar hi - join - yes.

Xelvar vai explicar que sugeriu aos gnomos contratarem pessoas para ajudá-los nos tempos difíceis, mas para que você possa entrar para a sociedade dos Gnomos, você precisará passar por um teste de recrutamento. Ele te dará 4 Teleport Crystals, que servirão para usar os Large Blue Crystals (teletransportes), e falará para você encontrar com Gnomerik, no escritório de recrutamento.
Nota: Você pode comprar mais Teleport Crystals de Xelvar (Kazordoon), Gnomette (Gnomebase) e Gnomincia (Gnomebase Alpha).
Use o teleporte ao leste de Xelvar e você sairá em um hub. Usando os Teleport Crystal, você poderá ir e voltar através desse hub para:
Vá ao centro do hub e desça uma escada que você vai encontrar. Agora siga ao noroeste e você estará no escritório de recrutamento.

Hub e Teleports
Nota: Adicionalmente você pode pedir para Gnomette, no centro do hub, para marcar o escritório no seu mapa falando hi - recruit - yes.
Xelvar
 |
Jogador: join
Xelvar: I am glad to hear that. In the spirit of our own foreign legion we suggested the gnomes might hire heroes like you to build some kind of troop. They gave me that strange crystal to allow people passage to their realm. ... |
 Recruitment
|
|
|
|||||||||
|
|
|
Recruitment Office
Chegando no escritório, você encontrará Gnomerik, aqui você começará o seu teste para ser um recruta.
O primeiro teste que você precisa fazer, é um teste de perguntas e repostas onde você deve escolher uma das 4 alternativas. Para passar neste teste você precisa marcar ao menos 100 pontos.

Fale com Gnomerik hi - recruitment - yes - test, e ele começará o teste, para cada resposta que você der, você deverá falar "test" de novo. Caso você marque menos de 100, você precisará comprar e beber uma Fresh Mushroom Beer de Gnominus, no norte da cidade.
Nota: Você deve tomar a bebida rápido, pois ela estraga em 20 segundos. Após tomar, você pode repetir o teste.
Para se dar bem no teste, você pode escolher as seguintes alternativas (na ordem): A - C - B - D - D - D - B - D - A - A - C - C - D - A - A - D
Com essas respostas, seu resultado será 112 e você passará no teste e poderá seguir para o próximo.
Gnomerik
|
Jogador: Hi
Gnomerik: Hello and welcome in the gnomish recruitment office. |
Se passar no teste
|
Jogador: result
Gnomerik: You have passed the test with 112 of 112 possible points. Congratulations. You are ready to proceed with the more physical parts of your examination! Go and talk to Gnomespector about it. |
Se falhar no teste
|
Jogador: result
Gnomerik: You have failed the test with 91 of 112 possible points. You probably were just too nervous. ... |
Medical Examination
Passando no teste de Gnomerik, você deverá seguir o caminho para o oeste até encontrar o Gnomespector. Com ele você fará a segunda parte do teste para recruta, o g-rays. Fale hi - recruit - yes e siga para o sul passando pelo caminho de piso verde (você se transformará em um Skeleton nessa parte). Pronto, você terminou aqui.
Gnomespector
|
Jogador: hi
Gnomespector: Hello fearless recruit. |
Ear Examination
Continue seguindo em frente e pare em um piso verde, no corredor ao lado do Doctor Gnomedix. Aqui você fará um exame nos ouvidos.
Quando você parar no piso verde, o NPC começará a examinar os seus ouvidos, fique parado até que um Strange Slime apareça na sua frente, quando isso acontecer, mate-o e você terá terminado essa parte do exame.

Shooting
Continue seguindo para o sul até ver o Gnomaticus, nessa parte do teste você deverá testar a sua pontaria em um jogo de tiro ao alvo. Fale hi - shooting - yes para o Gnomaticus.
Seu objetivo é acertar 5 vezes um Target Dummy ![]() , para isso, siga para o oeste do NPC e você verá um balcão com 3 Crystal Cannons, se posicione em um deles e, aleatoriamente, 2 tipo de bonecos aparecerão na sua frente, lembre-se de usar os cannon somente nos pretos.
, para isso, siga para o oeste do NPC e você verá um balcão com 3 Crystal Cannons, se posicione em um deles e, aleatoriamente, 2 tipo de bonecos aparecerão na sua frente, lembre-se de usar os cannon somente nos pretos.
Gnomaticus
|
Jogador: hi
Gnomaticus: Hi there! Are you here for the shooting test or to report your success? |
 Arquivo:Bigfoot's Burden Quest4.jpg
Nota: Lembre-se de acertar somente os bonecos pretos Target Dummy ![]()
Caso você acerte o Innocent Target ![]() , você perderá um ponto (você precisa de 5). Após acertar 5 Target Dummy e conseguir os seus pontos, retorne para o Gnomaticus e diga hi - report - yes para entregar a sua missão.
, você perderá um ponto (você precisa de 5). Após acertar 5 Target Dummy e conseguir os seus pontos, retorne para o Gnomaticus e diga hi - report - yes para entregar a sua missão.
Gnomaticus
|
Jogador: hi
Gnomaticus: Hi there! Are you here for the shooting test or to report your success? |
Endurance Test
Agora siga para o sudoeste e você encontrará com Gnomewart, diga hi - endurance. Seu objetivo aqui será apenas passar por um grande corredor.

Siga para sul do NPC e pise no Large Blue Crystal, você será teleportado para um grande corredor verde, seu objetivo é chegar ao outro teleporte que fica ao norte. No caminho haverá uma barreira que impedirá você de passar, para você conseguir passar você deve ficar tentando atravessá-la por cerca de 20 vezes.
Após conseguir, fale novamente com o Gnomewart hi - endurance, ele mandará você encontrar o Gnomelvis, que fica ao leste do Gnomewart.
Gnomewart
|
Jogador: hi
Gnomewart: Oh! Hi there! I guess you are here for the endurance test! |
|
Jogador: hi
Gnomewart: Oh! Hi there! I guess you are here for the endurance test! |
Soul Melody
Ok, chegamos na última fase do teste para se tornar um recruta. Agora que você achou o Gnomelvis, diga hi - musical, você terá que achar a combinação musical da sua Soul Melody com os cristais que emitem sons, ao todo existem 4 cristais.
Arquivo:Bigfoots Soul Melody NPC Gnomelvis.png
Gnomelvis
|
Jogador: hi
Gnomelvis: Hello. Is it me you're looking for? |
A melodia consiste em 7 sons, então você deverá usar os cristais até que você acerte a sequência. A sequência varia de jogador para jogador. Sempre que você acertar um cristal, fogos sairão de você, se isso não acontecer, é porque você errou a ordem.
Quando você erra, a sequência não muda, então se você já sabe qual é o primeiro, clique nele e tente adivinhar o segundo. Repita isso até encontrar a sequência de 7.
Nota: Pode acontecer de o cristal repetir mais de uma vez, mas nunca será 7 vezes o mesmo cristal.
Após conseguir achar a combinação da sua Soul Melody, corações vão sair de você, fale novamente com o Gnomelvis hi - musical, ele falará que você é um verdadeiro recruta da sociedade "Bigfoot" e que você deve encontrar com o Commander Stone para ajudá-lo com algumas tasks e marcará o seu mapa.
Gnomelvis
|
Jogador: hi
Gnomelvis: Hello. Is it me you're looking for? |

Localização do NPC Commander Stone
Gnome Reputation
Agora que você é um verdadeiro recruta, seu objetivo é ganhar mais reputação entre os Gnomos, você fará isso através de tasks que poderão ser repetidas a cada 20 horas. Cada task que você fizer, você ganhará algumas recompensas e 5 ou 10 de reputação. Quanto mais reputação você tiver, maior será o seu rank, e cada rank libera mais 2 tasks para você, além de acessos a outros locais. Os ranks são:
| Rank | Reputação | Achievement |
|---|---|---|
| Rank 0 | 0 | Nenhum |
| Rank I | 30 | |
| Rank II | 120 | |
| Rank III | 480 | |
| Rank IV | 1440 |
Além das tasks, você também pode trocar Minor Crystalline Tokens com Gnomally para ganhar reputação, 1 token equivale a 5 de reputação.
Além disso, no rank II você ganha acesso à Gnomebase Alpha e no rank IV às Warzones, ambos requerem uma Premium Time.
 Tasks - Rank 0
No início você ganhará duas tasks, veja abaixo. Estas tasks não requerem uma premium time.
|
|

Crystal Keeper

Esteja preparado para enfrentar: Wyverns, Earth Elementals e Crystalcrushers.
Nota: Se você quiser economizar tempo, você também pode pedir a missão "Spark Hunting" agora, ambas são na mesma caverna.
Para continuar com a quest, vá para o centro da Gnomebase usando o teleporte ao norte de Gnomelvis. Siga para o leste e você encontrará com o Commander Stone. Fale hi - mission - keeper para pegar a primeira task, você receberá um Gnomish Repair Crystal.
Seu objetivo nessa task é reparar 5 Damaged Crystal na Crystal Grounds. Siga para o nordeste, perto do escritório de recrutamento, e entre no teleporte da caverna.
Todos os Damaged Crystal desse andar estão marcados em verde no mapa abaixo.
Arquivo:Bigfoot's Burden Quest5.jpg
Ao encontrar o cristal, se ele não estiver quebrado, aguarde alguns segundos que ele ficará. Após isso, use o seu Gnomish Repair Crystal nele. Faça isso em 5 cristais (pode ser o mesmo), e então reporte sua missão ao Commander Stone falando hi - report - keeper.
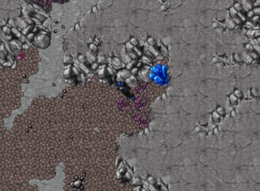
Crystal Damaged
- Bigfoot's Burden Quest6.jpg
Crystal Reparado

Você receberá 5 de reputação, 1 Minor Crystalline Token e 1 Gnomish Supply Package.
Nota: Se você perder o seu Gnomish Repair Crystal você pode comprar outro com a Gnomally por 50 gps.
Crystal Keeper
|
Jogador: hi
Commander Stone: Hello recruit. |
Entregando a missão.
|
Jogador: hi
Commander Stone: Hello recruit. |
Raiders of the Lost Spark
Nota: A Entrada para essa task é a mesma entrada da Keeper!
Esteja preparado para enfrentar: Wyverns, Earth Elementals e Crystalcrushers.
Fale novamente com o Commander Stone hi - mission - spark. Sua missão agora é extrair faíscas de energia de 7 Crystalcrushers, para isso você receberá um Gnomish Extraction Crystal.
Volte até a Crystal Grounds, a mesma caverna da task anterior, e mate 7 Crystalcrushers, espere alguns segundos e use o cristal no corpo da criatura.
Arquivo:Bigfoot's Burden Quest7.jpg
Após usar as 7 criaturas, volte e reporte sua missão ao Commander Stone falando hi - report - spark.
Você receberá 5 de reputação, 1 Minor Crystalline Token e 1 Gnomish Supply Package.
Nota: Se você perder o seu Gnomish Extraction Crystal você pode comprar outro com a Gnomally por 50 gps.
Raiders of the Lost Spark
|
Jogador: hi
Commander Stone: Hello recruit. |
Entregando a missão.
|
Jogador: hi
Commander Stone: Hello recruit. |
Tasks - Rank I
Quando você alcançar o rank I (30 de reputação) você ganhará duas novas tasks, veja abaixo. Estas tasks não requerem uma premium time.
|
|
Extermination

Esteja preparado para enfrentar: Wigglers, Wyverns, Massive Earth Elementals e Mushroom Sniffers.
Nota: Se você quiser economizar tempo, você também pode pedir a missão "Mushroom Digging" agora, ambas são na mesma caverna.
Assim que você alcançar o rank I (30 de reputação), você poderá fazer duas novas tasks. Para fazer essas tasks, vá até o Commander Stone e diga hi - mission - extermination. Ele falará que os Wigglers se tornaram uma praga e estão ameaçando os recursos e suprimentos dos Gnomos. Seu objetivo é matar 10 Wigglers.
Vá tudo para o norte e entre no teleporte dos Truffels Gardens, ao lado da Gnomally. Mate 10 Wigglers, e volte para reportar sua missão ao Commander Stone, dizendo hi - report - extermination.
Dica: Os Wigglers são realmente muito rápidos e correm quando sua vida está baixa, então quando eles começarem a correr, tome muito cuidado para não lurar outras criaturas.
Você receberá 5 de reputação, 1 Minor Crystalline Token e 1 Gnomish Supply Package.
Mushroom Digging
|
Jogador: hi
Commander Stone: Hello recruit. |
Entregando a missão.
|
Jogador: hi
Commander Stone: Hello recruit. |
Mushroom Digging
Nota: A Entrada para essa task é a mesma entrada da Extermination!
Esteja preparado para enfrentar: Wigglers, Wyverns, Massive Earth Elementals e Mushroom Sniffers.
Continuando com a quest, fale mais uma vez com o Commander Stone, hi - mission - digging. A sua tarefa agora será a alimentar um porco, ele lhe dará um Little Pig e você terá uma hora para fazer isso. Vá para o norte, nos Truffels Gardens (a mesma caverna da task anterior).
Para alimentar o porco, você deverá lurar os Mushroom Sniffers até os Mold Floor.
Arquivo:Bigfoot's Burden Quest8.jpg
Quando o Mushroom Sniffer passar por cima desse chão, ele vai "cavar" e vai aparecer bolinhas vermelhas, isso são os mushrooms, use o seu Little Pig nelas. É aconselhável a matar os mushroom sniffers se eles estiverem com a vida baixa, já que eles ficam fugindo, atrapalhando o jogador de fazer a task da quest.
Nota: Aleatoriamente pode não aparecer os mushrooms, neste caso você deve esperar o Mold Floor voltar ao normal e tentar novamente.
Arquivo:Bigfoot's Burden Quest9.jpg
Faça isso 3 vezes e retorne ao Commander Stone e reporte sua missão falando hi - report - digging.
Você receberá 5 de reputação, 1 Minor Crystalline Token e 1 Gnomish Supply Package.
Nota: Lembre-se que o Little Pig dura somente uma hora, caso esse tempo termine, você pode comprar outro Little Pig de Gnomally por 150 gps.
Extermination
|
Jogador: hi
Commander Stone: Hello recruit. |
Entregando a missão.
|
Jogador: hi
Commander Stone: Hello recruit. |
Tasks - Rank II
A partir de agora você precisará de uma premium time.
Quando você alcançar o rank II (120 de reputação) você ganhará duas novas tasks, veja abaixo.
|
|


Matchmaker
Nota: A entrada para essa task é a mesma da Keeper e Spark, mas o NPC está localizado na Gnomebase Alpha.
Esteja preparado para enfrentar: Wyverns, Earth Elementals e Crystalcrushers.
Para começar essa task, vá até a Gnomebase Alpha usando o teleporte no centro do Gnomebase, perto da loja de poções.

Entrada para a Gnomebase Alpha
Siga para o oeste e depois ao sul até ver o Gnomeral.

Localização Gnomeral
Diga hi - mission - matchmaker.
Ele irá te dar um Gnomish Crystal Package, use-o e você terá um Lonely Crystal. Sua tarefa agora é bem parecida com a "Crystal Keeper", do rank 0.
Volte para a Gnomebase e siga para a Crystal Grounds, nessa caverna existe vários cristais vermelhos, você deverá usar o seu Lonely Crystal em um deles, mas somente funcionará em um (é aleatório), abaixo temos um mapa com a localização de todos os cristais vermelhos:
Arquivo:Bigfoot's Burden Quest10.jpg
Nota: No segundo andar existe várias pedras vermelhas, elas não servem, o cristal vermelho que você está procurando é assim: .gif)
Vá usando o seu Lonely Crystal nos cristais vermelhos até achar o certo.
Arquivo:Bigfoot's Burden Quest11.jpg
Quando conseguir, volte para o Gnomeral na Gnomebase Alpha e report sua missão dizendo hi - report - matchmaker.
Você receberá 10 de reputação, 2 Minor Crystalline Tokens e 1 Gnomish Supply Package.
Matchmaker
|
Jogador: hi
Gnomeral: Hello there recruit! |
Entregando a missão.
|
Jogador: hi
Gnomeral: Hello there recruit! |
The Tinker's Bell
Esteja preparado para enfrentar: Damaged Crystal Golems e Enraged Crystal Golems.
Para a próxima tarefa, volte para o Gnomeral na Gnomebase Alpha e fale hi - mission - repair. Ele dirá que os Crystal Golems as vezes enlouquecem, e que um recente terremoto abalou toda a produção de uma fábrica de golems. Por esse motivo, ele te dará um Bell e pedirá para você recuperar alguns desses Crystal Golems.
Vá para o sul do Gnomeral e siga tudo para o leste até ver um placa escrito "Mission Teleporter Golem Workshop".

Entre no teleporte que estará um pouco ao sul dessa placa. Aqui você já poderá ver os golems, lá em baixo existem dois tipos de golems, os Enraged Crystal Golems e os Damaged Crystal Golems. Seu dever é encontrar 4 Damageds e usar os Bell neles, os Damageds ficarão correndo de você, por isso é recomendado que você mate todos os Enrageds para você não ficar trapado.
Arquivo:Bigfoot's Burden Quest12.jpg
Após usar o Bell em 4 Damaged Crystal Golems, retorne ao Gnomeral e report sua missão dizendo hi - report - repair.
Você receberá 5 de reputação, 2 Minor Crystalline Tokens e 1 Gnomish Supply Package.
Nota: Se você perder o seu Bell você pode comprar outro com a Gnomally por 50 gps.
The Tinker's Bell
|
Jogador: hi
Gnomeral: Hello there recruit! |
Entregando a missão.
|
Jogador: hi
Gnomeral: Hello there recruit! |
Tasks - Rank III
Quando você alcançar o rank III (480 de reputação) você ganhará duas novas tasks, veja abaixo.
|
|


Spores
Esteja preparado para enfrentar: Mutated Rats, Wyverns, Massive Earth Elementals, Giant Spiders, Wigglers, Crystalcrushers e Crystal Spiders (dependendo de até onde você for).
Continuando com a quest, vá até o Gnomeral, na Gnomebase Alpha e diga hi - mission - spore. Ele dirá para você reunir uma coleção especial de esporos. Ele te dará um Gnomish Spore Gatherer e falará para você usá-lo nos esporos em uma ordem que é: vermelho, verde, azul e amarelo. Você deve usar na ordem correta, caso contrário você terá que recomeçar. Se você não souber qual é a próxima cor, você pode dar look no item e olhar a descrição, a cor mudará conforme você for usando.
Vá até o Mushroom Fields, à sudeste de Gnomeral, desça dois andares até encontrar os Wigglers. Por toda essa área, existem Puffball Mushroom, você deverá usá-los para os esporos aparecerem.
Arquivo:Bigfoot's Burden Quest13.png
No entanto, a cor é aleatória, por isso só use o gatherer se aparecer a cor que você precisa. Após usar um Puffball Mushroom, você deverá esperar um tempo para usá-lo de novo, mas existem vários pela área.
Arquivo:Bigfoot's Burden Quest14.png
Após colocar as 4 cores corretamente, volte para o Gnomeral e reporte sua missão dizendo hi - report - spore.
Você receberá 10 de reputação, 2 Minor Crystalline Tokens e 1 Gnomish Supply Package.
Nota1: Caso você perca o seu Gnomish Spore Gatherer você pode comprar outro de Gnomally por 50 gps (lembre-se de ver na descrição qual é a próxima cor).
Nota2: Você pode coletar esporos em quantos Gnomish Spore Gatherer quiser, simultaneamente. Porém, só pode entregar a task uma vez ao dia. Isso é útil se quiser deixar sua task pronta pros próximos dias, ou ajudar alguém a fazê-la.
Spores
|
Jogador: hi
Gnomeral: Hello there recruit! |
Entregando a missão.
|
Jogador: hi
Gnomeral: Hello there recruit! |
Yet Another Grinding
Esteja preparado para enfrentar: Dragon Lords, Vulcongras, Massive Fire Elementals.
Volte ao Gnomeral e diga hi - mission - grindstone. Ele dirá que os Gnomos precisam de algumas pedras especiais para cortar e polir cristais. O problema é que elas só podem ser encontradas no Hot Spot e é muito perigoso. Seu dever será ir até lá e pegar para ele.
Vá para o sul de Gnomeral e entre no teleporte do Hot Spot. Você terá que ter sorte nessa missão, em vários locais dessa área existem rios de lava, na maioria desses rios existem Strange Stones ou Whetstones, seu dever é usar as Whetstones para pegar um Whetstone, se você não conseguir no primeiro, vai tentando até conseguir. Se você só encontrar Strange Stones, você deve esperar algum tempo para que ele vire as Whetstones.
Arquivo:Bigfoot's Burden Quest15.png
Quando você conseguir a Whetstone, você tem até uma hora para entregá-las ao Gnomeral, por isso, volte até ele e reporte sua missão dizendo hi - report - grindstone.
Você receberá 10 de reputação, 2 Minor Crystalline Tokens e 1 Gnomish Supply Package.
Yet Another Grinding
|
Jogador: hi
Gnomeral: Hello there recruit! |
Entregando a missão.
|
Jogador: hi
Gnomeral: Hello there recruit! |
Tasks - Rank IV
Agora que você chegou ao rank IV, você precisará de muitos suprimentos e um ótimo time para continuar. Lembre-se que todos os jogadores do seu time devem estar no rank IV e na respectiva warzone.
Devido a grande dificuldade dessas missões, é recomendado que o seu time tenha cerca de 20 pessoas em torno do level 200+.
|
Acessando as Warzones sem Red Teleport Crystal
Você pode acessar as Warzones sem ter que usar um Red Teleport Crystal, para isso você precisa entregar o Creature Item de cada boss ao NPC Gnomission, perguntando por HEROES.
Os itens são: Deathstrike's Snippet para a Warzone 1, Gnomevil's Hat para a Warzone 2 e Abyssador's Lash para a Warzone 3. Você pode dropar os itens ou simplesmente comprar de outro jogador.
Itens dos Bosses |
||||||
| Nome | Atributos | Peso | Dropa de | |||
| Deathstrike's Snippet | 3.80 oz |
|
| Gnomevil's Hat | 2.10 oz |
|
| Abyssador's Lash | 1.90 oz |
|
Warzones
|
|
|


Warzone I
Antes de começar com essa missão, cada membro do time precisará de um Red Teleport Crystal. Após isso, vá para a Gnomebase Alpha e siga para o leste e sul, até encontrar o Gnomission, diga hi - mission - yes.
Siga para o norte do NPC até encontrar o teleport para a warzone I.
Arquivo:Bigfoot's Burden Quest16.png
Passando o teleporte, você sairá em uma sala com o Gnomad e um outro teleporte, o Gnomad pode te dar algumas táticas para você conseguir terminar a wazone 1, basta falar hi - tactical. Passe pelo outro teleporte, é recomendado que os knights passem primeiro, pois do outro lado já tem criaturas.
Esteja preparado para enfrentar:
Criaturas |
||||||
| Nome | HP | Exp | Charm | Dificuldade | Loot | |
| Armadile |  |
|
| Hideous Fungus |  |
|
| Humongous Fungus |  |
|
| Stone Devourer |  |
|
Boss |
||||||
| Nome | HP | Exp | Charm | Dificuldade | Loot | |
| Deathstrike |  |
-- | -- |
|
Siga o mapa abaixo para chegar até o teleporte do boss:
Arquivo:Bigfoot's Burden Quest17.png
Chegando no destino, você encontrará um Green Crystal Stalagmite NÃO USE O CRISTAL. Posicione todo o time a direita do cristal, se você estiver jogando em Optional-PvP, é recomendado dar stack. Agora, use o cristal uma vez. Quando você usar, invasões de Humongous Fungus e Hideous Fungus irão começar, ao todo são 6 invasões. Você não precisa matar todos, mas deve aguentar até que um portal apareça no canto.
Nota: Se você for de Optional-PvP e todos estiverem em stack, você pode jogar Magic Walls cercando o grupo para evitar que todas as criaturas fiquem atacando vocês.
Arquivo:Bigfoot's Burden Quest18.png
O portal demorará 3 minutos para aparecer, quando ele aparecer todos devem entrar no teleport.
Nota: Vocês têm 30 segundos para entrar no teleport.
Deathstrike
Passando pelo teleport, o boss nascerá em alguns segundos. É recomendado que você bloqueie o boss no canto, com Wild Growths ou então que vários knights fiquem ao redor (se tiver knights suficientes). Os shooters devem ter cuidado com as magias de área do boss, e de preferência ficar na diagonal. Agora, mate o boss o mais rápido possível.
Nota: Se o time não conseguir, todos podem sair por um teleporte ao sudeste da sala.
Arquivo:Bigfoot's Burden Quest30.PNG
Se você conseguir matar o boss, saia pelo teleporte ao sudeste e volte até o teleporte da Warzone I, mas não entre, continue seguindo para o norte até ver o Deathstrike Treasure Chest, use-o para receber sua recompensa.
Você receberá:
e há a possibilidade de vir aleatoriamente um dos seguintes itens:

|
Nota: Se você quiser fazer novamente ou se você entrou no teleport do boss mas por algum motivo não o matou, você deve esperar 20 horas reais para repetir.
Warzone II
Após terminar a warzone I você conseguirá entrar no segundo teleporte localizado na imagem abaixo.
Nota: Para entrar na warzone II você vai precisar de 1 Red Teleport Crystal.
Arquivo:Bigfoot's Burden Quest20.png
Entrando na warzone II você encontrará o Gnomole e um outro teleporte, o Gnomole pode te dar algumas táticas para você conseguir terminar a wazone 2, basta falar hi - tactical.
Os beam de quase todas as criaturas dessa warzone causam mais de 800 danos (é recomendado ficar na diagonal), organize bem o seu grupo para que as criaturas não virem nos shooters. O objetivo dessa warzone é similar ao da primeira, você deve chegar até o teleporte que fica no final da warzone.
Arquivo:Bigfoot's Burden Quest19.png
Esteja preparado para enfrentar:
Criaturas |
||||||
| Nome | HP | Exp | Charm | Dificuldade | Loot | |
| Infected Weeper |  |
|
| Lava Golem |  |
|
| Lost Berserker |  |
|
| Magma Crawler |  |
|
| Weeper |  |
|
Boss |
||||||
| Nome | HP | Exp | Charm | Dificuldade | Loot | |
| Gnomevil |  |
-- | -- |
|
Mate todas as criaturas do caminho até chegar em uma parede de cristal que protege o teleporte para o próximo boss, quando chegar até a parede os knights do seu grupo devem voltar um pouco para encontrar o Infected Weeper, NÃO MATE ELE.
Lure o Infected Weeper até a parede de cristal, trape ele com alguns knights de forma que tenha espaço em volta do Infected Weeper para que ele possa sumonar Parasites, você deve matar os parasites na frente da parede de cristal para que a parede diminua cada vez mais, até que ela suma completamente (4 parasites) e seu time possa entrar no teleporte e enfrentar o boss (vocês têm 30 segundos para entrar).
Arquivo:Bigfoot's Burden Quest27.png
Gnomevil
Esse boss é o poderoso Gnomevil ele pode não parecer ameaçador, mas tome cuidado, procure lurar o boss para o canto e trape ele com alguns knights ou algumas Wild Growth Runes, os shooters têm que atacar com o que tiverem de mais forte pois o boss tem muita vida e um poder de cura muito constante.
Um grupo mínimo de 9 jogadores seria ideal para enfrentá-lo (3 Blockers, 1 Healer e 5 Shooters). A partir do momento que o primeiro jogador entrar na sala, a equipe terá 30 minutos para derrotá-lo, após isso todos serão teleportados para fora da sala.
Estratégia:
- Ao entrar na sala, dirijam-se para um dos cantos. Em mundos Optional PvP façam um stack no canto, em mundos Open PvP fiquem todos na parede.
- Quando o Gnomevil atacar alguém, os blockers devem cercá-lo, o Healer deve ficar próximo o suficiente para usar Mass Healing, enquanto os Shooters ficam atacando a distância.
- É recomendado que os mages usem Sudden Death Runes e Paladins usem Crystal Arrow/Prismatic Bolts
Nota: Se o time não conseguir, todos podem sair por um teleporte ao sudeste da sala.
Se você conseguir matar o boss, saia pelo teleporte ao sudeste e volte até o teleporte da Warzone II, e use o Gnomevil Treasure Chest para receber sua recompensa.
Você receberá:
e há a possibilidade de vir aleatoriamente um dos seguintes itens:
|
Nota: Se você quiser fazer novamente ou se você entrou no teleport do boss mas por algum motivo não o matou, você deve esperar 20 horas reais para repetir.
Warzone III
Após terminar a warzone II, você terá acesso ao terceiro teleporte localizado na imagem abaixo.
Nota: Para entrar na warzone III você vai precisar de 1 Red Teleport Crystal.
Arquivo:Bigfoot's Burden Quest21.png
Entrando na warzone III você vai encontrar a Gnomercy e outro teleporte, a Gnomercy pode te dar algumas táticas para você conseguir terminar a wazone 3, basta falar hi - tactical. Passe pelo outro teleporte (recomendado primeiro os knights), e siga o mapa abaixo para chegar no teleporte do boss.
Arquivo:Bigfoot's Burden Quest24.png
Esteja preparado para enfrentar:
Criaturas |
||||||
| Nome | HP | Exp | Charm | Dificuldade | Loot | |
| Cliff Strider |  |
|
| Ironblight |  |
|
| Lost Berserker | |
|
| Orewalker |  |
|
Bosses |
||||||
| Nome | HP | Exp | Charm | Dificuldade | Loot | |
| Minion of Versperoth |  |
-- | -- |
|
| Versperoth |  |
-- | -- |
|
| Abyssador |  |
-- | -- |
|
Versperoth
TOME CUIDADO, ao chegar no final do caminho, você encontrará os boss Versperoth e vários Minions of Versperoth. Não adianta ficar matando os Minions of Versperoths pois eles ficam aparecendo cada vez mais, por isso, a melhor tática aqui é os Knights correrem para matar os boss, junto com alguns shooters, enquanto os leveis mais baixo e os outros shooters ficam na entrada matando os Lava Golems, os shooters podem se fechar com Wild Growth Runes.
Arquivo:Bigfoot's Burden Quest25.png
Mate o boss o mais rápido possível, se ele sumir é só esperar um tempo que ele voltará. Quando o Versperoth for morto, um teleport irá aparecer e todos do time devem entrar, vocês têm 30 segundos para isso.
Abyssador
Após entrar no teleporte você estará dentro da sala do Abyssador, para matar esse boss é necessário um time de aproximadamente 40 pessoas, pois ele heala bastante.
Nota: Ele tem um heal raro que heala cerca de 300.000 de vida.
Estratégia:
- Mantenha 8 blokers em volta do Abyssador para que ele não vira pra nenhum shooter ou healer. Os healers precisam manter uma certa distância à diagonal do monstro para que suas waves não os acertem pois o dano é muito forte.
Arquivo:Bigfoot's Burden Quest26.png
Nota: Se o time não conseguir, todos podem sair por um teleporte ao leste da sala.
Se você conseguir matar o boss, saia pelo teleporte ao leste e volte até o teleporte da Warzone III, e use o Abyssador Treasure Chest para receber sua recompensa.
Você receberá:
e há a possibilidade de vir aleatoriamente um dos seguintes itens:
|
Nota: Se você quiser fazer novamente ou se você entrou no teleport do boss mas por algum motivo não o matou, você deve esperar 20 horas reais para repetir.
Completando as 3 Warzones
Após derrotar os 3 bosses nas Warzones, será permitido passar na porta ao lado do banco na gnomebase e pegar a recompensa: o Some Golden Fruits.
Negociando com Gnomission
Após matar 20 bosses (não precisa ser o mesmo), você poderá vender itens para o Gnomission. Nota: Os bosses que contam aqui são: Deathstrike, Gnomevil e Abyssador.