|
|
|
||||||||||||||||||||||||


Kilmaresh Quest: mudanças entre as edições
| [edição aprovada] | [edição aprovada] |
m |
m |
||
| Linha 424: | Linha 424: | ||
<span style="display:inline-block; width:100%; text-align:center; color:#000000; font-size:12px"><b>Clique no menu para ter mais informações abaixo.</b></span><br> | <span style="display:inline-block; width:100%; text-align:center; color:#000000; font-size:12px"><b>Clique no menu para ter mais informações abaixo.</b></span><br> | ||
< | {{Menu Quest | ||
| qtdBtn = 6 | |||
| altura = 45 | |||
| boss = não | |||
<!-------------------------------------------------------------------------------------------------------------------------------> | |||
| imgBtn01 = Shark | |||
| imgBtnSize01 = 50 | |||
| txtBtn01 = A Shark in Need | |||
| tituloTxtBtn01 = A Shark in Need | |||
| spoilerTxtBtn01 = | |||
<!------------------------------- INÍCIO DO TEXTO DO SPOILER P/ O BOTÂO Nº 01 ---------------------------------------------------> | |||
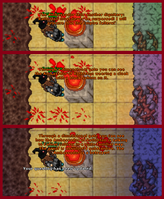
== [[Arquivo:The Golden Path.gif|40px|link=]] A Shark in Need [[Arquivo:The Golden Path.gif|40px|link=]] == | |||
{{DASH|'''Obs:''' Esta é uma missão opcional e não afeta o andamento da quest.}} | |||
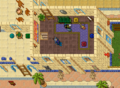
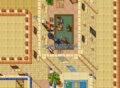
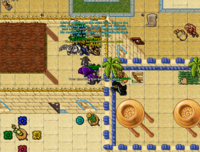
Um pobre tubarão está seriamente ferido, pois foi atacado por uma serpente do mar. Ele teve a sorte de escapar vivo, mas agora precisa da sua ajuda. Converse com [[Ninev]], ({{mapa|33867,31527,7:1|aqui}}), pergunte a ela sobre o tubarão, dizendo: '''"Shark"''', e ela te contará que precisa de uma pomada curativa que seja resistente à água salgada. Sua missão é encontrar os ingredientes para então fabricar a pomada. Há um livro em uma tumba ({{mapa|33853,31431,9:2|aqui}}) com a "[[Recipe|receita]]", que só pode ser pega se estiver nessa missão. | |||
'''Falando com Ninev''' | |||
{{Transcrições|npc=Ninev|texto= | |||
''Jogador:'' '''Hi'''<br> | |||
[[Ninev]]: Bastesh's blessing, dear guest!<br> | |||
''Jogador:'' '''Shark'''<br> | |||
[[Ninev]]: This poor shark is seriously injured. It seems it was attacked by a sea serpent. Those dangerous creatures seldom stray into the coastal waters around Kilmaresh but sometimes it happens. ...<br> | |||
[[Ninev]]: This shark was lucky enough to escape alive but now it's in need of help. Unfortunately I don't have the needed medicine here in the temple. Would you keep an eye open and look for it while hurling yourself into adventures?<br> | |||
''Jogador:'' '''Yes'''<br> | |||
[[Ninev]]: You're a kind soul, Bastesh may bless you. What I need is a healing salve that resists salt water. Perhaps you can find some of it out there.}} | |||
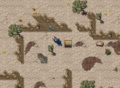
Siga para o oeste de Nikry Delta, ({{mapa|33758,31498,7:1|aqui}}), onde você poderá encontrar algumas [[Sheep]]s. Use a [[Ritual Scissors]] em uma ovelha '''VIVA''' para coletar uma [[Greasy Wool]], pode ser que falhe e a ovelha fuja. Além disso, vamos precisar de uma [[Box with Balm]], que pode ser coletada clicando nas cinzas no cemitério ao norte da cidade ({{mapa|33878,31440,7:1|aqui}}). | |||
<center><gallery mode="nolines" widths="200px" heights="200px" perrow="3"> | |||
Arquivo:Greasy Wool1.png|Usando a tesoura na ovelha | |||
Arquivo:Greasy Wool2.png|Coletando a Greasy Wool | |||
Arquivo:Ashes.png|Local da Box with Balm | |||
Arquivo:ItensPomada.png|Itens coletados | |||
Arquivo:ItensPomada2.png|Mensagem ao usar os Itens | |||
Arquivo:ItensPomada3.png|Pomada pronta | |||
</gallery></center> | |||
Use a [[Greasy Wool]] na [[Box with Balm]] para fazer uma [[Box with Waterproof Balm]] e entregue a pomada final a Ninev falando '''Hi - Mission - Yes'''. Como gratidão ela te dará um [[Golden Sea Horse Figurine]] [[Arquivo:Golden Sea Horse Figurine.gif|link=]]. | |||
'''Reportando a missão''' | |||
{{Transcrições|npc=Ninev|texto= | |||
''Jogador:'' '''Hi'''<br> | |||
[[Ninev]]: Bastesh's blessing, dear guest!<br> | |||
''Jogador:'' '''Mission'''<br> | |||
[[Ninev]]: Did you find the cure?<br> | |||
''Jogador:'' '''Yes'''<br> | |||
[[Ninev]]: Yes, this seems to be exactly what I need. Thank you, friend, Bastesh may bless you! Take this as a sign of my temple's gratitude.}} | |||
{{Voltar|link=A_Shark_in_Need}} | |||
<!--------------------------------- FIM DO TEXTO DO SPOILER P/ O BOTÂO Nº 01 ----------------------------------------------------> | |||
| imgBtn02 = Bashmu | |||
| imgBtnSize02 = 50 | |||
| txtBtn02 = Aspiring Oracle | |||
| tituloTxtBtn02 = Aspiring Oracle | |||
| spoilerTxtBtn02 = | |||
<!------------------------------- INÍCIO DO TEXTO DO SPOILER P/ O BOTÂO Nº 02 ---------------------------------------------------> | |||
== [[Arquivo:The Golden Path.gif|40px|link=]] Aspiring Oracle [[Arquivo:The Golden Path.gif|40px|link=]] == | |||
Para iniciar esta missão, vá até [[Taya]], ({{mapa|33815,31463,7:2|aqui}}) e fale '''Hi - Oracle - Yes'''. Ela nos contará que desde pequena sonha em se juntar ao círculo de profetas e videntes conhecido como Midnight Flame, porém, ela não nasceu clarividente e pede nossa ajuda para encontrar um artefato capaz de lhe dar esse dom. Ela também diz que devemos conversar com [[Narsai]], que fica nos jardim ao sul da praça central, {{mapa|33912,31529,7:2|aqui}}. | |||
'''Falando com Taya''' | |||
{{transcrições|npc=Taya|texto= | |||
''Jogador:'' '''Hi'''<br> | |||
[[Taya]]: Suon's blessing!<br> | |||
''Jogador:'' '''Oracle'''<br> | |||
[[Taya]]: Have you ever heard of the Circle of the Midnight Flame? They are an order of seers and prophets. Since I was a little girl it was my greatest dream to join them. ...<br> | |||
[[Taya]]: Sadly, I was not born with the gift of true seeing. But I firmly believe there is a way. I heard stories about an artefact that can grant the power of seeing. ...<br> | |||
[[Taya]]: But I have no idea how to get this artefact. I really want to be an oracle and join the Midnight Flame. Would you help me?<br> | |||
''Jogador:'' '''Yes'''<br> | |||
[[Taya]]: Suon be praised. Ask Narsai in Issavi about it. I guess she knows more.}} | |||
Agora devemos falar com Narsai, ela nos contará que há um artefato que pode conceder o dom da clarividência a quem usá-lo, ele se chama ''[[The Eye of Suon]]''. Narsai nos conta que o amuleto é feito de duas partes: uma gema e uma moldura dourada em formato de olho, porém, ele foi separado há muito tempo e está perdido. Usando seus dons, Narsai nos dirá que a moldura do amuleto está nas [[Salt Caves]], e que lá habitam [[Bashmu]]s. A gema, por sua vez, está ainda mais distante em algum lugar de [[Krailos]]. | |||
'''Falando com Narsai''' | |||
{{transcrições|npc=Narsai|texto= | |||
''Jogador:'' '''Hi'''<br> | |||
[[Narsai]]: Greetings, dear guest!<br> | |||
''Jogador:'' '''Oracle'''<br> | |||
[[Narsai]]: The young woman is right. There is in fact an artefact that might bestow the power of true seeing on a mortal human being. It is called the Eye of Suon. ...<br> | |||
[[Narsai]]: The legends tell that it consists of two parts: a precious red gem and a golden frame shaped like an eye. But the two parts were separated long ago and are now lost. ...<br> | |||
[[Narsai]]: My second sight tells me that the frame is still here in Kilmaresh. But it is far away ... in the Salt Caves underneath the Green Belt. Be careful, they are inhabited by Bashmu. ...<br> | |||
[[Narsai]]: Although some of them are benevolent creatures they despise it if someone enters their lairs. The gem on the other hand is quite far away. ...<br> | |||
[[Narsai]]: You can find it in the former part of Kilmaresh, now known as Krailos. You can take a ship to get there, but there is also a secret tunnel in the Ruins of Nuur. ...<br> | |||
[[Narsai]]: It still connects the ruins to the lost part of the Old Empire. A sealed door prevents the ogres from coming through. ...<br> | |||
[[Narsai]]: But you can open it by drawing a sun symbol on the door with your finger, right above the door knob. You will find the gem in the ruins of the Old Empire underneath Krailos. ...<br> | |||
[[Narsai]]: Find the two parts and combine them to restore the Eye of Suon. Then return to me and I will tell you more.}} | |||
<span class="titulo-quest">'''The Eye of Suon'''</span> [[Arquivo:The Eye of Suon.gif|link=]]<br> | |||
{{DASH|'''Nota:''' A partir daqui, nós enfrentaremos criaturas perigosas como [[Bashmu]]s e [[Juvenile Bashmu]]s, portanto tome cuidado!}} | |||
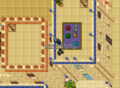
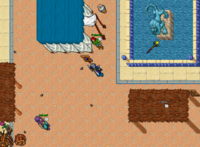
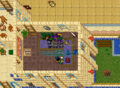
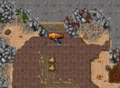
Nossa missão agora é encontrar as duas peças que compõem o amuleto. Vamos começar pela [[Eye-Shaped Frame|moldura dourada]] [[Arquivo:Eye-Shaped Frame.gif|link=]]. Ela será encontrada nas [[Salt Caves]], para chegar lá, vá até a saída sul da cidade ({{mapa|33939,31536,7:2|aqui}}) e caminhe até {{mapa|33970,31652,7:2|aqui}}. Entrando na caverna, você já encontrará [[Bashmu]]s e [[Juvenile Bashmu]]s, cuidado. A moldura está dentro de um barril [[Arquivo:Floating_Barrel.gif|link=]] ({{mapa|34018,31672,8:2|aqui}}), ''use'' o barril para receber o item. | |||
<gallery mode="nolines"> | |||
Arquivo:Kilmaresh Oracle 1-1.png|Entrada das Salt Caves | |||
Arquivo:Kilmaresh Oracle 1-2.png|Dê ''use'' no barril para obter o Eye-Shaped Frame | |||
</gallery> | |||
{{DASH|'''Nota:''' Neste momento ganhamos acesso a passagem subterrânea entre Kilmaresh e Krailos, ({{mapa|33775,31698,8:1|aqui}}).}} | |||
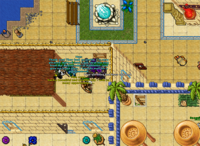
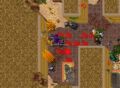
A segunda peça que compõe o amuleto (a [[Red Gem (Kilmaresh)|gema vermelha]] [[Arquivo:Red Gem (Kilmaresh).gif|link=]]), pode ser encontrada em [[Krailos]], mais especificamente nas [[Krailos Ruins]].<br> | |||
Você pode usar a passagem subterrânea, porem o caminho mais rápido para chegar lá é viajar de barco para Krailos e caminhar até ({{mapa|33580,31585,7:2|aqui}}). Entrando nas ruínas, você encontrará [[Nightmare]]s, [[Nightmare Scion]]s e [[Undead Gladiator]]s. A gema está dentro de um sarcófago [[Arquivo:Sarcophagus 1.gif|link=]] ({{mapa|33545,31554,9:2|aqui}}), ''use'' o sarcófago para coletar o item. | |||
<gallery mode="nolines"> | |||
Arquivo:Kilmaresh Oracle 1-3.png|Entrada de Krailos Ruins | |||
Arquivo:Kilmaresh Oracle 1-4.png|Obtendo a Red Gem | |||
</gallery> | |||
Agora que temos as duas peças, use a gema [[Arquivo:Red Gem (Kilmaresh).gif|link=]] na moldura [[Arquivo:Eye-Shaped Frame.gif|link=]] para restaurar o amuleto, criando assim o [[The Eye of Suon]] [[Arquivo:The Eye of Suon.gif|link=]]. Volte até a [[Narsai]] e fale '''Hi - Oracle'''. | |||
'''Reportando a missão''' | |||
{{transcrições|npc=Narsai|texto= | |||
''Jogador:'' '''Hi'''<br> | |||
[[Narsai]]: Greetings, dear guest!<br> | |||
''Jogador:'' '''Oracle'''<br> | |||
[[Narsai]]: You really found the parts and restored the Eye of Suon! I'm impressed! But the artefact won't grant the second sight yet. It has to be activated by a special blessing. ...<br> | |||
[[Narsai]]: There have been several Anuma, all of them lamassu and sphinxes, who were patrons of seers and oracles. Each of them has a statue, some here in Issavi, some elsewhere in Kilmaresh. ...<br> | |||
[[Narsai]]: Take this wine and sacrifice it at each of the statues by pouring it out in front of them. Here is a scroll that lists the names of the holy Anuma whose statues you have to find. ...<br> | |||
[[Narsai]]: If you bring all sacrifices the Eye of Suon will awake.}} | |||
Narsai ficará surpresa que você conseguiu encontrar e restaurar o amuleto, mas dirá que ele ainda não funciona, pois precisa de uma benção especial. Para recuperar os poderes do amuleto, deveremos fazer uma oferenda com [[Sacramental Wine]] [[Arquivo:Sacramental Wine.gif|link=]] aos Anumas. Cada um dos sete Anumas é representado por uma estátua, que estão espalhadas por Kilmaresh. Narsai nos entregará um [[Old Parchment (Kilmaresh)|pergaminho]] [[Arquivo:Old Parchment (Kilmaresh).gif|link=]] contendo os nomes dos Anuma cuja as estátuas devemos procurar, são eles: '''Nasramet, Zabaya, Anunit, Nesertis, Kematef, Yaeta e Rimush'''. | |||
{{DASH|'''Atenção:''' | |||
* Para que o ritual funcione você '''''precisa'' estar equipado''' com o amuleto [[The Eye of Suon]] [[Arquivo:The Eye of Suon.gif|link=]]. Caso contrário, você verá uma animação '''vermelha''' ao usar o vinho na estátua indicando que o ritual falhou. | |||
* Se você tentar usar o vinho em qualquer estátua que não esteja na lista, você receberá a mensagem: '''Sacrificing the wine here will not bestow the blessing of any Anuma on the amulet.'''. | |||
* Ao usar o vinho nas estátuas corretas você receberá a mensagem: '''You pour out the sacramental wine in front of ''nome'' statue.'''.}} | |||
<span class="titulo-quest">'''As Estátuas'''</span> [[Arquivo:Lamassu Statue.gif|link=]] [[Arquivo:Sphinx Statue 3.gif|link=]]<br> | |||
'''Cidade:'''<br> | |||
[[Arquivo:Lamassu Statue.gif|left|link=]] <span class="titulo-quest">'''Kematef'''</span> - High Gardens, ({{mapa|33933,31477,3:1|aqui}}).<br> | |||
<span style="color:green; font-family: Arial; font-weight: bold;"> | |||
You see a lamassu statue. | |||
You read: Kematef, Exarch of the Southern Lands. | |||
</span><br><br> | |||
[[Arquivo:Sphinx Statue 3.gif|left|link=]] <span class="titulo-quest">'''Nesertis'''</span> - Saída Sul, ({{mapa|33947,31526,7:2|aqui}}).<br> | |||
<span style="color:green; font-family: Arial; font-weight: bold;"> | |||
You see a sphinx statue. | |||
You read: Nesertis, Sage of Sun and Sea. | |||
</span><br><br> | |||
'''Nykri Delta:'''<br> | |||
[[Arquivo:Sphinx Statue 3.gif|left|link=]] <span class="titulo-quest">'''Anunit'''</span> - Tumba, ({{mapa|33741,31505,8:3|aqui}}).<br> | |||
<span style="color:green; font-family: Arial; font-weight: bold;"> | |||
You see a sphinx statue. | |||
You read: In honour of Anunit, Defender of Nuur. | |||
</span><br><br> | |||
[[Arquivo:Sphinx Statue 3.gif|left|link=]] <span class="titulo-quest">'''Yaeta'''</span> - [[Kilmaresh Catacombs]], ({{mapa|33896,31438,9:3|aqui}}).<br> | |||
<span style="color:green; font-family: Arial; font-weight: bold;"> | |||
You see a sphinx statue. | |||
You read: In honour of Yaeta, Protectrix of the Northern Lands. | |||
</span><br><br> | |||
[[Arquivo:Lamassu Statue.gif|left|link=]] <span class="titulo-quest">'''Zabaya'''</span> - Cemitério, ({{mapa|33854,31480,7:3|aqui}}).<br> | |||
<span style="color:green; font-family: Arial; font-weight: bold;"> | |||
You see a lamassu statue. | |||
You read: Zabaya, Herald of Suon. | |||
</span><br><br> | |||
'''Central Steppe:'''<br> | |||
[[Arquivo:Sphinx Statue 3.gif|left|link=]] <span class="titulo-quest">'''Nasramet'''</span> - [[Central Steppe]], ({{mapa|33848,31579,7:3|aqui}}).<br> | |||
<span style="color:green; font-family: Arial; font-weight: bold;"> | |||
You see a sphinx statue. | |||
You read: Nasramet, Blessed Protector of Kilmaresh. | |||
</span><br><br> | |||
'''Southern Steppe:'''<br> | |||
[[Arquivo:Lamassu Statue.gif|left|link=]] <span class="titulo-quest">'''Rimush'''</span> - [[Ruins of Nuur]], ({{mapa|33836,31714,10:2|aqui}}).<br> | |||
<span style="color:green; font-family: Arial; font-weight: bold;"> | |||
You see a lamassu statue. | |||
You read: Rimush, High King of the Mountains. | |||
</span><br><br> | |||
{{DASH|'''Nota:''' Caso não tenha feito ainda a missão ''Wanted'', aproveite para pegar o item necessário perto da Estátua Rimush. O espelho dourado fica na caixa [[Arquivo:Ornate Case.gif|link=]] localizada ({{mapa|33861,31712,10:2|aqui}})}} | |||
Após realizar a oferenda à todas as estátuas o vinho irá sumir, retorne até [[Taya]] e fale '''Hi - Oracle'''. Ela irá pegar o amuleto e agradecerá sua ajuda e diz que poderá finalmente se tornar um oráculo. Usando seus novos poderes, ela nos avisa que existe uma terrível criatura que ameaça o povo de Kilmaresh: o mantícora [[Enusat The Onyx Wing]], ela pede sua ajuda para que você encontre e elimine este monstro. | |||
'''Reportando a missão''' | |||
{{transcrições|npc=Taya|texto= | |||
''Jogador:'' '''Hi'''<br> | |||
[[Taya]]: Suon's blessing!<br> | |||
''Jogador:'' '''Oracle'''<br> | |||
[[Taya]]: You offered a sacrifice for the holy seer sphinxes and lamassu! The Eye of Suon is now blessed and I can be an oracle. ...<br> | |||
[[Taya]]: And, wait ... I already see a danger. Enusat the Onyx Wing! He is a black Manticore who threatens the people living in the small steppe villages. ...<br> | |||
[[Taya]]: Please, find and kill him to protect those people. He might be high up in the mountains but could also dwell in one of the old tombs underneath the steppe.}} | |||
<span class="titulo-quest">'''Enusat The Onyx Wing'''</span><span style="vertical-align: text-bottom; padding-left:10px">[[Arquivo:Enusat The Onyx Wing.gif|link=]]</span></br> | |||
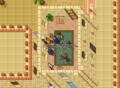
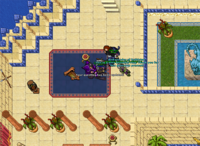
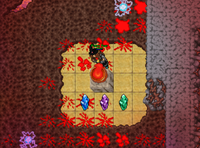
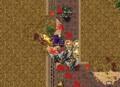
Enusat está em uma tumba na [[Central Steppe]] ({{mapa|33795,31551,7:2|aqui}}), ele é acompanhado de duas [[Sphinx]]es e dois [[Crypt Warden]]s. O boss ataca a distância, portanto é recomendável matar as outras criaturas da tumba para que não atrapalhem você e seu time. | |||
{{DASH|'''Nota:''' Para concluir a missão é necessário que o jogador seja o responsável pela maior parte do dano causado ao [[Enusat The Onyx Wing]].}} | |||
[[Arquivo:BossEnusat.png|300px]] | |||
Após matar Enusat, volte até [[Taya]] e reporte a missão falando '''Hi - Oracle'''. Ela agradecerá a sua ajuda e te dará 03 [[Sun Mosaic]]s [[Arquivo:Sun Mosaic.gif|link=]] como recompensa, em conjunto eles formam um mosaico [[Arquivo:Sun Mosaic 1.gif|link=]] que pode ser pendurado na parede. | |||
'''Reportando a missão''' | |||
{{transcrições|npc=Taya|texto= | |||
''Jogador:'' '''Hi'''<br> | |||
[[Taya]]: Suon's blessing!<br> | |||
''Jogador:'' '''Oracle'''<br> | |||
[[Taya]]: You killed the Onyx Wing! Well done, you saved the lives of many villagers out there! Please take this mosaic as a sign of my gratitude.}} | |||
{{Voltar|link=Aspiring_Oracle}} | |||
<!--------------------------------- FIM DO TEXTO DO SPOILER P/ O BOTÂO Nº 02 ----------------------------------------------------> | |||
| imgBtn03 = Sun-marked Goanna | |||
| imgBtnSize03 = 50 | |||
| txtBtn03 = Midnight Rituals | |||
| tituloTxtBtn03 = Midnight Rituals | |||
| spoilerTxtBtn03 = | |||
<!------------------------------- INÍCIO DO TEXTO DO SPOILER P/ O BOTÂO Nº 03 ---------------------------------------------------> | |||
== [[Arquivo:The Golden Path.gif|40px|link=]] Midnight Rituals [[Arquivo:The Golden Path.gif|40px|link=]] == | == [[Arquivo:The Golden Path.gif|40px|link=]] Midnight Rituals [[Arquivo:The Golden Path.gif|40px|link=]] == | ||
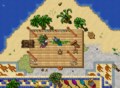
Após terminar a missão Fafnar's Wrath, você poderá ajudar [[Kallimae]], ela diz que alguns moradores estão precisando de ingredientes para terminar um ritual. Caso você concorde em ajudar, você deverá encontrar os NPCs [[Yonan]], [[Narsai]], [[Shimun]] e [[Tefrit]]. | Após terminar a missão Fafnar's Wrath, você poderá ajudar [[Kallimae]], ela diz que alguns moradores estão precisando de ingredientes para terminar um ritual. Caso você concorde em ajudar, você deverá encontrar os NPCs [[Yonan]], [[Narsai]], [[Shimun]] e [[Tefrit]]. | ||
| Linha 719: | Linha 889: | ||
Ela irá pegar [[Symbol of Sun and Sea]] e em troca irá te dar um [[Blue and Golden Cordon]] [[Arquivo:Blue and Golden Cordon.gif|link=]], uma das 4 partes necessárias para montarmos o [[The Regalia of Suon]]. | Ela irá pegar [[Symbol of Sun and Sea]] e em troca irá te dar um [[Blue and Golden Cordon]] [[Arquivo:Blue and Golden Cordon.gif|link=]], uma das 4 partes necessárias para montarmos o [[The Regalia of Suon]]. | ||
{{Voltar|link=Midnight_Rituals}} | {{Voltar|link=Midnight_Rituals}} | ||
</ | <!--------------------------------- FIM DO TEXTO DO SPOILER P/ O BOTÂO Nº 03 ----------------------------------------------------> | ||
| imgBtn04 = Medusa | |||
< | | imgBtnSize04 = 50 | ||
| txtBtn04 = The Boards that<br>Mean the World | |||
| tituloTxtBtn04 = The Boards that Mean the World | |||
| spoilerTxtBtn04 = | |||
<!------------------------------- INÍCIO DO TEXTO DO SPOILER P/ O BOTÂO Nº 04 ---------------------------------------------------> | |||
== [[Arquivo:The Golden Path.gif|40px|link=]] The Boards that Mean the World [[Arquivo:The Golden Path.gif|40px|link=]] == | == [[Arquivo:The Golden Path.gif|40px|link=]] The Boards that Mean the World [[Arquivo:The Golden Path.gif|40px|link=]] == | ||
Para essa missão procure pela Medusa a NPC [[Alyxo]], ela fica ao norte do depot de [[Issavi]] ({{Mapa|33941,31464,7:1|aqui}}), ela tem alguns trabalhos para você. | Para essa missão procure pela Medusa a NPC [[Alyxo]], ela fica ao norte do depot de [[Issavi]] ({{Mapa|33941,31464,7:1|aqui}}), ela tem alguns trabalhos para você. | ||
| Linha 852: | Linha 1 026: | ||
</gallery> | </gallery> | ||
{{Voltar|link=The_Boards_that_Mean_the_World}} | {{Voltar|link=The_Boards_that_Mean_the_World}} | ||
</ | <!--------------------------------- FIM DO TEXTO DO SPOILER P/ O BOTÂO Nº 04 ----------------------------------------------------> | ||
| imgBtn05 = Ogre Ruffian | |||
< | | imgBtnSize05 = 50 | ||
| txtBtn05 = The Revenge<br>of the Ogres | |||
| tituloTxtBtn05 = The Revenge of the Ogres | |||
| spoilerTxtBtn05 = | |||
<!------------------------------- INÍCIO DO TEXTO DO SPOILER P/ O BOTÂO Nº 05 ---------------------------------------------------> | |||
== [[Arquivo:The Golden Path.gif|40px|link=]] The Revenge of the Ogres [[Arquivo:The Golden Path.gif|40px|link=]] == | == [[Arquivo:The Golden Path.gif|40px|link=]] The Revenge of the Ogres [[Arquivo:The Golden Path.gif|40px|link=]] == | ||
{{:Quest:Kilmaresh Puzzle}} | {{:Quest:Kilmaresh Puzzle}} | ||
{{Voltar|link=The_Revenge_of_the_Ogres}} | {{Voltar|link=The_Revenge_of_the_Ogres}} | ||
</ | <!--------------------------------- FIM DO TEXTO DO SPOILER P/ O BOTÂO Nº 05 ----------------------------------------------------> | ||
| imgBtn06 = Venerable Girtablilu | |||
| imgBtnSize06 = 50 | |||
| txtBtn06 = Wanted | |||
| tituloTxtBtn06 = Wanted | |||
| spoilerTxtBtn06 = | |||
<!------------------------------- INÍCIO DO TEXTO DO SPOILER P/ O BOTÂO Nº 06 ---------------------------------------------------> | |||
== [[Arquivo:The Golden Path.gif|40px|link=]] Wanted [[Arquivo:The Golden Path.gif|40px|link=]] == | == [[Arquivo:The Golden Path.gif|40px|link=]] Wanted [[Arquivo:The Golden Path.gif|40px|link=]] == | ||
Para iniciar esta missão, vá até [[Eshaya]], ({{mapa|33916,31498,6:2|aqui}}) e fale '''Hi - Wanted - Yes'''. Ele nos contará que há quatro indivíduos que são procurados pela Sapphire Blade (grupo do qual Eshaya é líder). Ele pede nossa ajuda para capturá-los, ao aceitar a missão ele nos avisa que um dos quatro procurados pode ser inocente. Para descobrirmos quem é, devemos conversar com a [[Kallimae]], ela fica nos jardins suspensos, ({{mapa|33939,31481,5:2|aqui}}). | Para iniciar esta missão, vá até [[Eshaya]], ({{mapa|33916,31498,6:2|aqui}}) e fale '''Hi - Wanted - Yes'''. Ele nos contará que há quatro indivíduos que são procurados pela Sapphire Blade (grupo do qual Eshaya é líder). Ele pede nossa ajuda para capturá-los, ao aceitar a missão ele nos avisa que um dos quatro procurados pode ser inocente. Para descobrirmos quem é, devemos conversar com a [[Kallimae]], ela fica nos jardins suspensos, ({{mapa|33939,31481,5:2|aqui}}). | ||
| Linha 1 219: | Linha 1 209: | ||
[[Arquivo:Outfit Citizen of Issavi Male.gif|link=]] [[Arquivo:Outfit Citizen of Issavi Female.gif|link=]]<br> | [[Arquivo:Outfit Citizen of Issavi Male.gif|link=]] [[Arquivo:Outfit Citizen of Issavi Female.gif|link=]]<br> | ||
{{Voltar|link=Wanted}} | {{Voltar|link=Wanted}} | ||
</ | <!--------------------------------- FIM DO TEXTO DO SPOILER P/ O BOTÂO Nº 06 ----------------------------------------------------> | ||
}} | |||
= Extras = | = Extras = | ||

Edição das 22h02min de 29 de dezembro de 2021

Veja também: Quests.
Requerimentos
- 05 Vials;
- Bark Peeler;
- Hand Auger;
- Net (Ferramenta);
- Pick (Enchanted);
- Ritual Scissors;
- Scythe ou Canivete;
- Suprimentos.
Método
Os cidadãos de Kilmaresh precisam de ajuda. Você poderá realizar diferentes missões para restabelecer a ordem, impedir a destruição da cidade e curar um pobre tubarão, entre outras. Para começar, encontrar-se com o Eshaya, que te contará sobre a situação da cidade e atribuirá a você uma grande responsabilidade.
 Fafnar's Wrath
Encontre-se com Eshaya, em Issavi (aqui![]() ). Diga Hi - Mission. Ele lhe dirá que precisa de provas de que o Ambassador Of Rathleton conspira, em parceria com os cultistas de Fafnar, contra a cidade de Kilmaresh. Inicialmente ele pede que você vá até a residência dele, na parte leste da cidade e procure por cartas, diários ou qualquer outra prova concreta de que ele é um traidor.
). Diga Hi - Mission. Ele lhe dirá que precisa de provas de que o Ambassador Of Rathleton conspira, em parceria com os cultistas de Fafnar, contra a cidade de Kilmaresh. Inicialmente ele pede que você vá até a residência dele, na parte leste da cidade e procure por cartas, diários ou qualquer outra prova concreta de que ele é um traidor.
Falando com Eshaya
 |
Jogador: Hi
Eshaya: Suon's and Bastesh's blessing, dear guest! |
NPC Eshaya

The Ambassador Of Rathleton
Aceite a missão e vá até a casa do embaixador, que fica próxima ao tapete mágica da cidade (aqui![]() ). O objetivo é vasculhar a casa e procurar evidências que mostrem uma possível traição.
). O objetivo é vasculhar a casa e procurar evidências que mostrem uma possível traição.
- Na sala de entrada, clique na pilha de pergaminhos Arquivo:Pile of Scrolls.gif, que contém a mensagem: "Você examina os pergaminhos cuidadosamente. São ordens de Rathleton para o embaixador. Nenhum sinal de traição aqui."
- No andar acima, clique no pergaminho queimado,
 , que está no chão em frente a chaminé, a mensagem exibida é a seguinte: "Documentos foram queimados aqui recentemente. Apenas parte de um pergaminho ainda está em frente à chaminé, mas está muito escurecido para ser lido."
 - Vá para o sul do quarto próximo aos pedaços de papeis rasgados e você receberá a mensagem: "Restos de papel estão espalhados pelo chão. Demora algum tempo para juntá-los novamente. Mas é apenas um poema mal escrito."
- Suba mais um andar e caminhe em direção aos livros Arquivo:Books.gif no chão, onde você poderá ler: "Você não encontrou nada na casa do Embaixador. Se ele é de fato um traidor, se livrou de qualquer evidência que pudesse incriminá-lo."
Casa do Embaixador
1ª Evidência, pergaminhos em cima da mesa.
2ª Evidência, recente pedaço de papel queimado na lareira.
3ª Evidência, papel rasgado, porém apenas um poema ruim.
4ª Evidência, livros largados em um canto do ambiente.


Retorne a Eshaya dizendo Hi - Mission, aparentemente o Embaixador destruiu todas as evidências de sua traição. Além disso, ele te contará que a única maneira de provar que ele é um traidor será analisar suas memórias.
Reportando a missão
|
Jogador: Hi
Eshaya: Suon's and Bastesh's blessing, dear guest! |
Após falar com Eshaya, você precisará obter um Anel de Pensamentos Secretos. Diz a lenda que uma criatura monstruosa chamada Urmahlullu tem esse anel. Ele diz ainda que se os mitos forem verdade, você poderá encontrar este ser em um túmulo subterrâneo ao sul de Issavi.
Urmahlullu the Immaculate
Forme um time de 5 jogadores e siga até a saída sul da cidade, aqui![]() . Saia e continue indo em direção ao sul até encontrar um Ancient Sepulchre
. Saia e continue indo em direção ao sul até encontrar um Ancient Sepulchre ![]() (aqui
(aqui![]() ). Ao passar por cima do Ancient Sepulchre, você irá acessar o andar inferior onde vai encontrar um teleport que leva a sala da alavanca do boss.
). Ao passar por cima do Ancient Sepulchre, você irá acessar o andar inferior onde vai encontrar um teleport que leva a sala da alavanca do boss.
| Dica: Você pode trapar o boss ao lado do teleport de SAÍDA no norte da sala. |
Ao entrar em seu covil, o Boss estará em sua primeira forma, Urmahlullu the Immaculate. Conforme o time luta contra Urmahlullu, ele mudará de forma quatro vezes, baseando-se na quantidade de dano sofrido. Suas cinco formas são:
|
➡ |  |
➡ |  |
➡ |  |
➡ |  |
| 1º Forma: Urmahlullu the Immaculate |
2º Forma: Wildness of Urmahlullu |
3º Forma: Urmahlullu the Tamed |
4º Forma: Wisdom of Urmahlullu |
5º Forma: Urmahlullu the Weakened |
Estratégia:
Todas as formas de Urmahlullu compartilham uma única vida, variando somente suas resistências, portanto é preciso causar bastante dano ao boss. Tendo em mente as suas resistências (imunidade à dano de fogo), recomenda-se o uso Sudden Death Runes, visto que a maioria de suas formas é vulnerável a dano de morte.
Notas:
|
Após matá-lo todos os jogadores, que não tiverem concluído a missão, terão como recompensa o loot do boss juntamente com um Ring of Secret Thoughts.

Boss em sua forma inicial

Como trapar o Boss

Boss morto e loot


Volte a falar com Eshaya sobre sua "Mission". Ele pedirá que você dê o anel ao Embaixador como um presente, pois assim que usá-lo, suas memórias serão armazenadas nele.
Falando com Eshaya
|
Jogador: hi
Eshaya: Suon's and Bastesh's blessing, dear guest! |
Vá para o quarto andar do palácio, aqui![]() , e entregue o "Present" ao Embaixador. Ele ficará feliz com o presente, porém voltando até Eshaya, descobriremos que vamos precisar do anel de volta. Eshaya dirá que precisaremos encontrar alguém que tenha habilidades de roubo, mas que não faz ideia de onde você vai encontrar alguém assim em Issavi.
, e entregue o "Present" ao Embaixador. Ele ficará feliz com o presente, porém voltando até Eshaya, descobriremos que vamos precisar do anel de volta. Eshaya dirá que precisaremos encontrar alguém que tenha habilidades de roubo, mas que não faz ideia de onde você vai encontrar alguém assim em Issavi.
Falando com o Ambassador Of Rathleton
|
Jogador: hi
Ambassador Of Rathleton: Greetings, friend. |
Entregando o anel.

Falando com Eshaya
|
Jogador: hi
Eshaya: Suon's and Bastesh's blessing, dear guest! |
Gifts for Moe
| Nota: A missão Gifts for Moe aparece como uma missão separada no quest log, porém não é possível concluir a missão Fafnar's Wrath sem completar esta missão antes. |
Sua missão agora é encontrar alguém que possa "recuperar" o anel. Fale com Moe, você o encontrará no primeiro edifício ao sul do Depot, dois andares acima do térreo, aqui![]() .
Diga hi - help ou ring. Moe irá dizer que pode fazer isso, mas com a condição de que você lhe traga 10 Sphinx Feathers
.
Diga hi - help ou ring. Moe irá dizer que pode fazer isso, mas com a condição de que você lhe traga 10 Sphinx Feathers ![]() para ele. Você pode conseguir as penas caçando Sphinxes ou comprá-las no mercado. Entregue-as ao macaco dizendo hi - help. Ele ficará satisfeito e lhe pedirá que aguarde por 1 hora, pois ele precisa esperar uma oportunidade para roubar o anel.
para ele. Você pode conseguir as penas caçando Sphinxes ou comprá-las no mercado. Entregue-as ao macaco dizendo hi - help. Ele ficará satisfeito e lhe pedirá que aguarde por 1 hora, pois ele precisa esperar uma oportunidade para roubar o anel.
Falando com Moe
|
Jogador: hi
Moe: Greetings, traveller. It seems, you're a guest here, just like me.
|
Passado o tempo de espera necessário, retorne ao Moe e diga hi - ring. Ele te entregará o anel, que agora contém as memórias do Embaixador. Fale novamente com Eshaya, ele dirá que você deve vasculhar as memórias do embaixador mas diz que não sabe como usar o anel e que você talvez consiga alguma informação com o bibliotecário, The Librarian.
Falando com Moe após 1 hora
|
Jogador: hi
Moe: Greetings, traveller. It seems, you're a guest here, just like me. |
Entregando as penas para Moe.
Moe entregando o anel


Falando com Eshaya
|
Jogador: hi
Eshaya: Suon's and Bastesh's blessing, dear guest! |
The Ring of Secret Thoughts![]()
Leve o anel para o The Librarian, que fica no segundo andar do palácio, aqui![]() . Diga "ring" e ele vai explicar que para extrair memórias do anel, você tem que entrar em um tipo de estado de transe com a ajuda de um alucinógeno. Assim, ao entrar neste estado no Templo de Bastesh, você poderá ver todas as memórias que estão armazenadas ali.
. Diga "ring" e ele vai explicar que para extrair memórias do anel, você tem que entrar em um tipo de estado de transe com a ajuda de um alucinógeno. Assim, ao entrar neste estado no Templo de Bastesh, você poderá ver todas as memórias que estão armazenadas ali.
Falando com The Librarian
 |
Jogador: hi
The Librarian: Greetings, dear guest. If you are interested in paperware such as books or scrolls, ask me for a trade. |
Seu próximo passo é conseguir o alucinógeno, para isto, vá até o mercado no centro da cidade (aqui![]() ) e diga para Faloriel Hi - Ring - Yes. Ela te venderá um Flask of Hallucinogen por 1.000 gps.
) e diga para Faloriel Hi - Ring - Yes. Ela te venderá um Flask of Hallucinogen por 1.000 gps.
| Dica: Você pode comprar múltiplos frascos de halucinógeno e entregá-los à outras pessoas que já concluíram esta parte da quest para que elas possam te ajudar. |
Falando com Faloriel
 |
O Bibliotecário
Faloriel


Notas:
|
Vá para o Temple of Bastesh, localizado ao sul do lado leste da cidade (aqui![]() ). Equipe o Ring of Secret Thoughts (Charged) e use o Flask of Hallucinogen em si mesmo. Você será teleportado para dentro da mente do embaixador. O mapa tem o formato de um cérebro, possuindo dois lados, você pode ser enviado para qualquer um deles.
Se seu time for teleportado separado, vocês podem se encontrar usando os Mirror Neuron, pisando um deles você passará para o outro lado. Sua missão aqui é matar Earworms para coletar 01 Green Memory Shard
). Equipe o Ring of Secret Thoughts (Charged) e use o Flask of Hallucinogen em si mesmo. Você será teleportado para dentro da mente do embaixador. O mapa tem o formato de um cérebro, possuindo dois lados, você pode ser enviado para qualquer um deles.
Se seu time for teleportado separado, vocês podem se encontrar usando os Mirror Neuron, pisando um deles você passará para o outro lado. Sua missão aqui é matar Earworms para coletar 01 Green Memory Shard ![]() , 01 Violet Memory Shard
, 01 Violet Memory Shard ![]() e 01 Blue Memory Shard
e 01 Blue Memory Shard ![]() para cada jogador do time.
para cada jogador do time.

Em posse dos 3 fragmentos, siga para o lado esquerdo do cérebro e use um por vez no basin Memory Englitener. Procure um dos portal de saída, que ficam ao norte do cérebro. Continue tomando cuidado para não pisar nos Energy Fields, você ainda precisará dos 3 fragmentos.
Memory Englitener e os Memory Shards
Descobrindo as Memorias do Ambassador


Ao usarmos os Memory Shards descobrimos as memorias ocultas do Ambassador Of Rathleton, e de fato ele é um traidor.
1ª Memória: O embaixador diz a outro dignitário: "Rathleton nunca deve ser superado! Eu farei com que o Império vacile!"
2ª Memória: Através de um portão dimensional, você pode ver o embaixador de Rathleton vestindo uma capa com a marca da Esfinge Negra (Black Sphinx).
3ª Memória: Através de um portal dimensional, você pode ver como o embaixador de Rathleton está conversando com cultistas de Fafnar de uma maneira bastante familiar. A prova é absolutamente substantiva. O embaixador é um traidor!
| Nota: Guarde os fragmentos com você, pois precisará deles ainda. |
Com a descoberta feita, retorne ao NPC Eshaya e reporte sua hi - mission. Ele dirá que aquela era a prova de que precisava e que a Imperatriz te concederá uma audiência.
Falando com Eshaya
|
Entregando a missão a Eshaya

The Last Request
Encontre a The Empress no palácio, aqui![]() . Diga "hi" e ela pegará seus fragmentos, que são as provas de que o Embaixador de Rathleton é de fato um traidor, portanto não os tire de sua backpack quando for falar com ela. Além disso, ela te pedirá um último favor.
. Diga "hi" e ela pegará seus fragmentos, que são as provas de que o Embaixador de Rathleton é de fato um traidor, portanto não os tire de sua backpack quando for falar com ela. Além disso, ela te pedirá um último favor.
Falando com a The Empress
|
Jogador: hi
The Empress: I see. There is enough and adequate evidence that the Ambassador of Rathleton is indeed an arch traitor. So, Eshaya was right. Well done, mortal being. You have proven your loyalty and bravery, therefore allow me to ask you one more favour. ... |
A Imperatriz

A Imperatriz explica que o culto de Fafnar é um problema sério para Issavi. Os cultistas estão vagando nos esgotos e catacumbas sob a cidade de vez em quando e estão planejando causar um grande terremoto, que poderia danificar seriamente ou até mesmo destruir Issavi. Eles querem ativar cinco estátuas Fafnar que estão escondidas nas catacumbas debaixo da cidade. Ela te entregará um Sceptre of Sun and Sea ![]() e pedirá que você use-o nas estátuas para abençoá-las em nome de Suon e Bastesh. Isso destruirá o feitiço de desastre e Issavi estará a salvo novamente. Sua missão agora é obter acesso às catacumbas, você precisará coletar 4 máscaras que te permitirão passar pelas portas.
e pedirá que você use-o nas estátuas para abençoá-las em nome de Suon e Bastesh. Isso destruirá o feitiço de desastre e Issavi estará a salvo novamente. Sua missão agora é obter acesso às catacumbas, você precisará coletar 4 máscaras que te permitirão passar pelas portas.
Obtendo as Máscaras
A localização de cada máscara pode ser descoberta ao ler instruções secretas, 3 delas podem ser coletadas como loot de Burning Gladiators e Priestesses Of The Wild Sun, a quarta encontra-se em uma garrafa localizada no mar ao sul do NPC Shimun (aqui![]() ). Porém não é necessário tê-las para pegar as máscaras.
). Porém não é necessário tê-las para pegar as máscaras.
|
|
|
|
Cada máscara serve para o jogador poder atravessar um tipo de porta do Bastesh Temple, e a Gryphon Mask e Ivory Mask além de abrirem duas das portas tem usos especiais específicos para cada uma que veremos mais adiante.
The Blessing of Bastesh and Suon![]()
Com todas as máscaras e o cetro em mãos, siga para as catacumbas abaixo da cidade (aqui![]() ). Desça 2 andares até encontrar as 5 Statue of Fafnar (Kilmaresh). O caminho mais seguro é utilizar a entrada norte, após a ponte, na cripta das Sphinxes. Use o Sceptre of Sun and Sea em cada uma delas:
). Desça 2 andares até encontrar as 5 Statue of Fafnar (Kilmaresh). O caminho mais seguro é utilizar a entrada norte, após a ponte, na cripta das Sphinxes. Use o Sceptre of Sun and Sea em cada uma delas:

Mapa do local com as indicações

A esquerda da porta de entrada (aqui
 )
)

Ao sul da porta de entrada (aqui
)

Nordeste da porta de entrada (aqui
)
Noroeste da porta de entrada (aqui
)

Norte da porta de entrada (aqui
)


Após abençoar cada uma das estátuas, retorne à The Empress e relate sua missão falando Hi. Como recompensa por Issavi estar segura novamente, ela te dará um Sun Medal ![]() como um sinal de gratidão e irá explicar que essa medalha é uma preciosa relíquia dos tempos antigos. Esta é uma das quatro partes da
como um sinal de gratidão e irá explicar que essa medalha é uma preciosa relíquia dos tempos antigos. Esta é uma das quatro partes da ![]() The Regalia of Suon. Se você encontrar as outras três partes, um joalheiro talentoso poderá combiná-las e recriar a regalia para você. O que permitirá que você dome um Gryphon.
The Regalia of Suon. Se você encontrar as outras três partes, um joalheiro talentoso poderá combiná-las e recriar a regalia para você. O que permitirá que você dome um Gryphon.
Reportando a missão
|
Jogador: Hi
The Empress: You succeeded! Issavi is safe again. Take this as a sign of our grace and gratitude, brave mortal being. It is a precious relic from earlier times. More precisely, it is one of four parts of the relic called the Regalia of Suon. ... |
Finalizando a missão Fafnar's Wrath.

| Dito isso vamos atrás dos outros 3 pedaços da Regalia o Suon! Notas:
|
Clique no menu para ter mais informações abaixo.
|
|
|
|
|
|


A Shark in Need
| Obs: Esta é uma missão opcional e não afeta o andamento da quest. |
Um pobre tubarão está seriamente ferido, pois foi atacado por uma serpente do mar. Ele teve a sorte de escapar vivo, mas agora precisa da sua ajuda. Converse com Ninev, (aqui![]() ), pergunte a ela sobre o tubarão, dizendo: "Shark", e ela te contará que precisa de uma pomada curativa que seja resistente à água salgada. Sua missão é encontrar os ingredientes para então fabricar a pomada. Há um livro em uma tumba (aqui
), pergunte a ela sobre o tubarão, dizendo: "Shark", e ela te contará que precisa de uma pomada curativa que seja resistente à água salgada. Sua missão é encontrar os ingredientes para então fabricar a pomada. Há um livro em uma tumba (aqui![]() ) com a "receita", que só pode ser pega se estiver nessa missão.
) com a "receita", que só pode ser pega se estiver nessa missão.
Falando com Ninev
 |
Jogador: Hi
Ninev: Bastesh's blessing, dear guest! |
Siga para o oeste de Nikry Delta, (aqui![]() ), onde você poderá encontrar algumas Sheeps. Use a Ritual Scissors em uma ovelha VIVA para coletar uma Greasy Wool, pode ser que falhe e a ovelha fuja. Além disso, vamos precisar de uma Box with Balm, que pode ser coletada clicando nas cinzas no cemitério ao norte da cidade (aqui
), onde você poderá encontrar algumas Sheeps. Use a Ritual Scissors em uma ovelha VIVA para coletar uma Greasy Wool, pode ser que falhe e a ovelha fuja. Além disso, vamos precisar de uma Box with Balm, que pode ser coletada clicando nas cinzas no cemitério ao norte da cidade (aqui![]() ).
).

Usando a tesoura na ovelha
Coletando a Greasy Wool

Local da Box with Balm

Itens coletados

Mensagem ao usar os Itens

Pomada pronta


Use a Greasy Wool na Box with Balm para fazer uma Box with Waterproof Balm e entregue a pomada final a Ninev falando Hi - Mission - Yes. Como gratidão ela te dará um Golden Sea Horse Figurine ![]() .
.
Reportando a missão
|
|
|
|
|
Aspiring Oracle
Para iniciar esta missão, vá até Taya, (aqui![]() ) e fale Hi - Oracle - Yes. Ela nos contará que desde pequena sonha em se juntar ao círculo de profetas e videntes conhecido como Midnight Flame, porém, ela não nasceu clarividente e pede nossa ajuda para encontrar um artefato capaz de lhe dar esse dom. Ela também diz que devemos conversar com Narsai, que fica nos jardim ao sul da praça central, aqui
) e fale Hi - Oracle - Yes. Ela nos contará que desde pequena sonha em se juntar ao círculo de profetas e videntes conhecido como Midnight Flame, porém, ela não nasceu clarividente e pede nossa ajuda para encontrar um artefato capaz de lhe dar esse dom. Ela também diz que devemos conversar com Narsai, que fica nos jardim ao sul da praça central, aqui![]() .
.
Falando com Taya
 |
Jogador: Hi
Taya: Suon's blessing! |
Agora devemos falar com Narsai, ela nos contará que há um artefato que pode conceder o dom da clarividência a quem usá-lo, ele se chama The Eye of Suon. Narsai nos conta que o amuleto é feito de duas partes: uma gema e uma moldura dourada em formato de olho, porém, ele foi separado há muito tempo e está perdido. Usando seus dons, Narsai nos dirá que a moldura do amuleto está nas Salt Caves, e que lá habitam Bashmus. A gema, por sua vez, está ainda mais distante em algum lugar de Krailos.
Falando com Narsai
 |
Jogador: Hi
Narsai: Greetings, dear guest! |
The Eye of Suon ![]()
| Nota: A partir daqui, nós enfrentaremos criaturas perigosas como Bashmus e Juvenile Bashmus, portanto tome cuidado! |
Nossa missão agora é encontrar as duas peças que compõem o amuleto. Vamos começar pela moldura dourada ![]() . Ela será encontrada nas Salt Caves, para chegar lá, vá até a saída sul da cidade (aqui
. Ela será encontrada nas Salt Caves, para chegar lá, vá até a saída sul da cidade (aqui![]() ) e caminhe até aqui
) e caminhe até aqui![]() . Entrando na caverna, você já encontrará Bashmus e Juvenile Bashmus, cuidado. A moldura está dentro de um barril
. Entrando na caverna, você já encontrará Bashmus e Juvenile Bashmus, cuidado. A moldura está dentro de um barril ![]() (aqui
(aqui![]() ), use o barril para receber o item.
), use o barril para receber o item.
Entrada das Salt Caves

Dê use no barril para obter o Eye-Shaped Frame


| Nota: Neste momento ganhamos acesso a passagem subterrânea entre Kilmaresh e Krailos, (aqui |
A segunda peça que compõe o amuleto (a gema vermelha ![]() ), pode ser encontrada em Krailos, mais especificamente nas Krailos Ruins.
), pode ser encontrada em Krailos, mais especificamente nas Krailos Ruins.
Você pode usar a passagem subterrânea, porem o caminho mais rápido para chegar lá é viajar de barco para Krailos e caminhar até (aqui![]() ). Entrando nas ruínas, você encontrará Nightmares, Nightmare Scions e Undead Gladiators. A gema está dentro de um sarcófago
). Entrando nas ruínas, você encontrará Nightmares, Nightmare Scions e Undead Gladiators. A gema está dentro de um sarcófago  (aqui
(aqui![]() ), use o sarcófago para coletar o item.
), use o sarcófago para coletar o item.
Entrada de Krailos Ruins
Obtendo a Red Gem


Agora que temos as duas peças, use a gema ![]() na moldura
na moldura ![]() para restaurar o amuleto, criando assim o The Eye of Suon
para restaurar o amuleto, criando assim o The Eye of Suon ![]() . Volte até a Narsai e fale Hi - Oracle.
. Volte até a Narsai e fale Hi - Oracle.
Reportando a missão
|
Jogador: Hi
Narsai: Greetings, dear guest! |
Narsai ficará surpresa que você conseguiu encontrar e restaurar o amuleto, mas dirá que ele ainda não funciona, pois precisa de uma benção especial. Para recuperar os poderes do amuleto, deveremos fazer uma oferenda com Sacramental Wine ![]() aos Anumas. Cada um dos sete Anumas é representado por uma estátua, que estão espalhadas por Kilmaresh. Narsai nos entregará um pergaminho
aos Anumas. Cada um dos sete Anumas é representado por uma estátua, que estão espalhadas por Kilmaresh. Narsai nos entregará um pergaminho ![]() contendo os nomes dos Anuma cuja as estátuas devemos procurar, são eles: Nasramet, Zabaya, Anunit, Nesertis, Kematef, Yaeta e Rimush.
contendo os nomes dos Anuma cuja as estátuas devemos procurar, são eles: Nasramet, Zabaya, Anunit, Nesertis, Kematef, Yaeta e Rimush.
Atenção:
|
As Estátuas 

Cidade:
You see a lamassu statue.
You read: Kematef, Exarch of the Southern Lands.
You see a sphinx statue.
You read: Nesertis, Sage of Sun and Sea.
Nykri Delta:
You see a sphinx statue.
You read: In honour of Anunit, Defender of Nuur.
You see a sphinx statue.
You read: In honour of Yaeta, Protectrix of the Northern Lands.
You see a lamassu statue.
You read: Zabaya, Herald of Suon.
Central Steppe:
You see a sphinx statue.
You read: Nasramet, Blessed Protector of Kilmaresh.
Southern Steppe:
You see a lamassu statue.
You read: Rimush, High King of the Mountains.
| Nota: Caso não tenha feito ainda a missão Wanted, aproveite para pegar o item necessário perto da Estátua Rimush. O espelho dourado fica na caixa |
Após realizar a oferenda à todas as estátuas o vinho irá sumir, retorne até Taya e fale Hi - Oracle. Ela irá pegar o amuleto e agradecerá sua ajuda e diz que poderá finalmente se tornar um oráculo. Usando seus novos poderes, ela nos avisa que existe uma terrível criatura que ameaça o povo de Kilmaresh: o mantícora Enusat The Onyx Wing, ela pede sua ajuda para que você encontre e elimine este monstro.
Reportando a missão
|
Jogador: Hi
Taya: Suon's blessing! |
Enusat The Onyx Wing
Enusat está em uma tumba na Central Steppe (aqui![]() ), ele é acompanhado de duas Sphinxes e dois Crypt Wardens. O boss ataca a distância, portanto é recomendável matar as outras criaturas da tumba para que não atrapalhem você e seu time.
), ele é acompanhado de duas Sphinxes e dois Crypt Wardens. O boss ataca a distância, portanto é recomendável matar as outras criaturas da tumba para que não atrapalhem você e seu time.
| Nota: Para concluir a missão é necessário que o jogador seja o responsável pela maior parte do dano causado ao Enusat The Onyx Wing. |

Após matar Enusat, volte até Taya e reporte a missão falando Hi - Oracle. Ela agradecerá a sua ajuda e te dará 03 Sun Mosaics ![]() como recompensa, em conjunto eles formam um mosaico
como recompensa, em conjunto eles formam um mosaico ![]() que pode ser pendurado na parede.
que pode ser pendurado na parede.
Reportando a missão
|
|
|
|
|
Midnight Rituals
Após terminar a missão Fafnar's Wrath, você poderá ajudar Kallimae, ela diz que alguns moradores estão precisando de ingredientes para terminar um ritual. Caso você concorde em ajudar, você deverá encontrar os NPCs Yonan, Narsai, Shimun e Tefrit.
Conseguindo as Ferramentas
Antes de procurá-los, você já poderá ir adiantando as ferramentas necessárias para coleta dos itens, são elas:
- Ritual Scissors
 que é obtida dentro de um sarcófago em uma tumba no cemitério ao norte da cidade.
Desça (aqui![]() ), e apenas use o sarcófago (aqui
), e apenas use o sarcófago (aqui![]() ) para obter a Ritual Scissors.
Com ela iremos poder cortas as flores encontradas na região, além das teias de aranhas e até mesmo os pelos de uma ovelha.
) para obter a Ritual Scissors.
Com ela iremos poder cortas as flores encontradas na região, além das teias de aranhas e até mesmo os pelos de uma ovelha.
- Bark Peeler
 que é encontrado dentro de uma caixa ao sul do barco de Issavi (aqui). Com ele iremos conseguir pegar a casca de Honey Palms, árvores típicas encontradas na região.
 - Hand Auger
 que pode ser comprado em lojas de ferramentas por 25gps, é com ela iremos tirar leite dos cactos.
Com as 3 ferramentas em mãos, podemos começar a coletar alguns dos itens.
Helping Yonan
Yonan é um habilidoso joalheiro da cidade, ele pode ser encontrado no mercado do centro de Issavi(aqui![]() ). Fale Hi - Mission ele te entregará a Yonan's List, que é uma lista com os ingredientes que faltam para ele completar o seu ritual, além de uma Pick (Enchanted)
). Fale Hi - Mission ele te entregará a Yonan's List, que é uma lista com os ingredientes que faltam para ele completar o seu ritual, além de uma Pick (Enchanted) ![]() .
.
Falando com Yonan
|
Jogador: Hi
Yonan: Greetings, dear guest! I'm looking forward to trade with you. |
Ingredientes:
- 03 Scorpion Tails

- 12 Veldt Flowers

- 10 Tagralt Nugget

Coletando os ingredientes:
- As Scorpion Tails você poderá coletar matando e dropando de Scorpions, existem poucos na ilha então aconselhamos a ir em um local com maior número, como Drefia, por exemplo. Outra opção é comprar este item no Market caso o preço seja acessível para você.
- As Veldt Flowers se encontram espalhadas por quase toda Kilmaresh a aparência dela antes de ser cortada é
 , então quando ver uma dessas, use a para obter uma .
- + =
- Os Tagralt Nuggets iremos conseguir usando a pick encantada em uma Veined Stone
 , elas estão espalhadas por Kilmaresh, você poderá coletar apenas 3 por vez, após isso a sua pick perderá o encanto, sendo necessário esperar cerca de 5 minutos para que o encantamento volte à sua força normal.
 + =
+ =

Coletando todos os itens basta falar com Yonan (hi - ritual - yes).
Entregando os Itens
|
Jogador: Hi
Yonan: Greetings, dear guest! I'm looking forward to trade with you. |
Helping Narsai
Narsai fica bem próxima à Yonan, ao sul do centro da cidade de Issavi, (aqui![]() ). Fale Hi - Mission e ela lhe entregará a Narsai's List, uma lista com os ingredientes que faltam para que ela complete o ritual.
). Fale Hi - Mission e ela lhe entregará a Narsai's List, uma lista com os ingredientes que faltam para que ela complete o ritual.
Falando com Narsai
|
Jogador: Hi
Narsai: Greetings, dear guest! |
Ingredientes:
Coletando os ingredientes:
- Os Vial of Cactus Milk você irá precisar da ferramenta Hand Auger, que pode ser comprada em lojas de ferramentas por 25 gps. Com ela em mãos, procure por pequenos cactos, os Flowering Cactus. Você poderá encontrá-los por toda parte em Kilmaresh e também em Krailos.
- +
 =
= 
- Os Piece of Crocodile Leather podem ser obtidos como loot de Crocodiles, há alguns na ilha, porém você pode comprar no Market, se o preço for acessível.
- Os Jars of Honey talvez seja o item mais difícil de se juntar. Você precisará enfrentar criaturas consideravelmente fortes tais como Black Sphinx Acolyte, Burning Gladiators e Priestess Of The Wild Sun, para dropar o Empty Honey Glass. Um respawn dessas criaturas é encontrado ao norte do Depot da cidade em um buraco (aqui) Coletando 05 desses potes é hora de enche-los com o mel, basta usar em uma Honey Palm para obter a Jar of Honey.
| Dica: Um Empty Honey Glass pode ser encontrado dentro de uma crate em Issavi (aqui |
 +
+  =
= 
| Cuidado: Não clique nela, pois por se tratar de uma comida, ao clicar nela você irá comê-la e terá que conseguir outra para entregar para Narsai. |

Coletando todos os itens basta falar com Narsai novamente (hi - ritual - yes).
Entregando os Itens
|
Jogador: Hi
Narsai: Greetings, dear guest! |
Helping Shimun
Partindo agora para ajudar os NPCs que se encontram fora da cidade, vamos atrás de Shimun, ele fica ao noroeste de Issavi (aqui![]() ), cuidado pois no caminho você poderá enfrentar alguns Lamassus, Sphinxes. Chegando lá, fale Hi - Mission ele te entregará a Shimun's List, uma lista com os ingredientes que faltam para que ele complete o seu ritual.
), cuidado pois no caminho você poderá enfrentar alguns Lamassus, Sphinxes. Chegando lá, fale Hi - Mission ele te entregará a Shimun's List, uma lista com os ingredientes que faltam para que ele complete o seu ritual.
Falando com Shimun
|
Ingredientes:
- 01 Lizard Heart

- 12 Snake Maws

- 05 Vial of Ink

Coletando os ingredientes:
- Para pegar o Lizard Heart o jogador precisará matar algumas Adult Goannas e Young Goannas, pois é loot delas. Este item também pode ser comercializado pelo Market.
- Para coletarmos os Snake Maws iremos precisar novamente das Ritual Scissors, e procurar pela planta Snake Maw (Object) para "cortar" e obter o item que precisamos.
- +
 =
=
- Para coletarmos os 05 Vial of Ink, 1° consiga 05 Vials vazios, pois vamos precisar deles para encher com a tinta. Você pode comprar Vial of Fruit Juice da NPC Ramina em Issavi(aqui), basta esvaziá-los. Com os frascos vazios em mãos, siga para a biblioteca da cidade e tome muito cuidado pois enfrentaremos 02 Biting Books. Desça as escadas ao sul(aqui), desça novamente preparado para enfrentar os monstros. Ao derrotar os Biting Books, use os Vials em seus corpos para obter Vial of Ink.

Coletando todos os itens basta falar com Shimun novamente (hi - ritual - yes).
Entregando os Itens
|
Jogador: Hi
Shimun: Bastesh's blessings, dear guest! |
Helping Tefrit
A NPC Tefrit é a que está localizada mais longe da cidade de Issavi e no local mais perigoso, pois o caminho está repleto de criaturas como: Adult Goannas, Black Sphinx Acolyte, Burning Gladiator, Manticore, Feral Sphinx, Priestess Of The Wild Sun, Young Goanna entre outros, portanto muito cuidado principalmente se for sozinho. Ela fica na montanha à sudoeste de Issavi, para chegarmos lá devemos sair pelo sul da cidade (aqui![]() ), depois siga para oeste até encontrar uma escada, aqui
), depois siga para oeste até encontrar uma escada, aqui![]() , continue indo para oeste até chegar neste ponto aqui
, continue indo para oeste até chegar neste ponto aqui![]() , use a magia Levitate para subir e cuidado para não ser "trapado" pelos monstros, depois siga para o sul também com cuidado até encontrar as escadas para subir (aqui
, use a magia Levitate para subir e cuidado para não ser "trapado" pelos monstros, depois siga para o sul também com cuidado até encontrar as escadas para subir (aqui![]() ). Chegando lá, fale Hi - Mission, ela te entregará a Tefrit's List, uma lista com os ingredientes que faltam para ela completar o seu ritual.
). Chegando lá, fale Hi - Mission, ela te entregará a Tefrit's List, uma lista com os ingredientes que faltam para ela completar o seu ritual.
Falando com Tefrit
|
Jogador: Hi
Tefrit: Greetings, traveller! May Bastesh bless you. |
Ingredientes:
Coletando os ingredientes:
- Os Crab Pincers conseguimos como loot de Crabs, há alguns em Kilmaresh, mas o jogador poderá optar por um outro respawn, outra opção é comprar no market.
- As 20 Honey Palm Bark podem ser coletadas ao utilizar um Bark Peeler em uma Honey Palm. O Bark Peeler pode ser coletado próximo ao barco.
- + =

- Para coletar as Spiderweb Clouds Shreds iremos precisar das Ritual Scissors e cortar quando encontrarmos elas no chão, você irá conseguir cortar até 5 pedaços por teia.
- As Wild Desert Roses se encontram espalhadas por quase toda Kilmaresh, mas principalmente no cemitério ao norte da cidade. A aparência dela antes de ser cortada é
 , então quando ver uma dessas, use a para obter uma
  .
.
- + = .

Coletando todos os itens basta falar com Tefrit novamente (hi - ritual - yes).
Entregando os Itens
|
Jogador: Hi
Tefrit: Greetings, traveller! May Bastesh bless you. |
Após entregar todos os itens aos NPCs, volte para Kallimae e fale Hi - Mission - Yes, ela irá agradecer e dirá que agora você terá que fazer a peregrinação da meia noite, indo em 4 locais de presságios dados pela própria Deusa Bastesh, são eles:
Reportando a missão
 |
Jogador: Hi
Kallimae: Suon's and Bastesh's blessing, dear guest! |
The Tree with The Owl.gif)
Siga pela saída norte como se estivesse indo à "fazenda" de Shimun. Chegando lá, vá até esse ponto aqui![]() , você encontrará a árvore com a coruja.
, você encontrará a árvore com a coruja.
Árvore da Coruja

Dizem que esta árvore é um presságio, já que não existem corujas em Kilmaresh, essa é a única.
Ao chegar perto dela uma mensagem aparecerá pronto podemos seguir para o próximo ponto.
The Bleeding Tree
Para chegar até a esse ponto, siga agora para o sul, até essa escada (aqui![]() ), a árvore se encontra bem próximo da escada, basta ir para esquerda e você a encontrará. Tome cuidado, pois pode haver uma grande quantidade de criaturas como Manticores, Feral Sphinx, Adult Goanna e Young Goanna.
), a árvore se encontra bem próximo da escada, basta ir para esquerda e você a encontrará. Tome cuidado, pois pode haver uma grande quantidade de criaturas como Manticores, Feral Sphinx, Adult Goanna e Young Goanna.

Diz-se que esta árvore é um presságio, pois ao ser atingida por uma flecha a árvore começou, e ainda continua a sangrar.
Assim como a árvore da coruja, basta chegar próximo do local para uma mensagem aparecer, tudo certo por aqui, podemos seguir para o próximo ponto.
Sun-marked Goanna
Podemos agora seguir ao sul da árvore que sangra, atravesse uma ponte e siga para esquerda (aqui![]() ), você encontrará a Sun-marked Goanna juntamente com outras Goannas, mate-a para obter um Goanna Hide with Sun Symbol
), você encontrará a Sun-marked Goanna juntamente com outras Goannas, mate-a para obter um Goanna Hide with Sun Symbol ![]() .
.
Pronto, podemos seguir par ao último ponto.
Boss Sun-marked Goanna

The Basin Filled with Blood
O Basin Filled with Blood fica localizado nas Kilmaresh Catacombs, siga para o cemitério ao norte da cidade e desça aqui![]() . Próximo do local onde você pegou sua Ritual Scissors você verá uma rachadura (aqui
. Próximo do local onde você pegou sua Ritual Scissors você verá uma rachadura (aqui![]() ), pise-a para cair no andar debaixo, cuidado com as criaturas do local: Sphinx, Crypt Warden. O basin está localizado logo a direita (aqui
), pise-a para cair no andar debaixo, cuidado com as criaturas do local: Sphinx, Crypt Warden. O basin está localizado logo a direita (aqui![]() ), diferentemente das árvores, aqui você deverá usar o basin para pegar o Symbol of Sun and Sea
), diferentemente das árvores, aqui você deverá usar o basin para pegar o Symbol of Sun and Sea ![]() .
.


Basin de Sangue onde possível obter o Symbol of Sun and Sea.

Com seu Symbol of Sun and Sea em mãos, e após ter encontrado os outros três pontos, podemos retornar para Kallimae e reportar a missão falando Hi - Mission - Yes.
Reportando a missão
|
Jogador: Hi
Kallimae: Suon's and Bastesh's blessing, dear guest! |

Finalizando a missão Midnight Rituals.

Ela irá pegar Symbol of Sun and Sea e em troca irá te dar um Blue and Golden Cordon ![]() , uma das 4 partes necessárias para montarmos o The Regalia of Suon.
, uma das 4 partes necessárias para montarmos o The Regalia of Suon.
|
|
|
|
The Boards that Mean the World
Para essa missão procure pela Medusa a NPC Alyxo, ela fica ao norte do depot de Issavi (aqui![]() ), ela tem alguns trabalhos para você.
), ela tem alguns trabalhos para você.
The Three Demons
Fale Hi - Mission para Alyxo, ela irá contar que demônios foram invocados durante uma peça de teatro. Ela pedirá sua ajuda para eliminar esses 3 demônios, já que estão causando problemas em Kilmaresh.
Falando com Alyxo
 |
Alyxo: Greetings, dear art lover! Welcome to the Seaside Theatre!
Jogador: mission |
Mozradek
O boss mais próximo é o Mozradek, que fica em uma tumba a direita de Alyxo (aqui![]() ), desça com cuidado, pois no local encontraremos: Black Sphinx Acolytes, Burning Gladiators e Priestess Of The Wild Sun, siga ao norte e no canto esquerdo você encontrará uma rachadura (aqui
), desça com cuidado, pois no local encontraremos: Black Sphinx Acolytes, Burning Gladiators e Priestess Of The Wild Sun, siga ao norte e no canto esquerdo você encontrará uma rachadura (aqui![]() ), pise-a para cair no local onde encontraremos o boss. Caso esteja sozinho, cuidado com os ataques em linha reta. Mate-o e poderemos seguir para os próximos.
), pise-a para cair no local onde encontraremos o boss. Caso esteja sozinho, cuidado com os ataques em linha reta. Mate-o e poderemos seguir para os próximos.

Bragrumol
Siga para sudoeste de Issavi, cuidado pois no caminho encontraremos diversas criaturas. Bragrumol esta localizado em uma caverna (aqui![]() ) acessada por um Ancient Sepulchre, se estiver sozinho, cuidado com seus ataques de reta que podem bater cerca de 1,300 de hp. Derrotando Bragrumol, podemos seguir para o próximo.
) acessada por um Ancient Sepulchre, se estiver sozinho, cuidado com seus ataques de reta que podem bater cerca de 1,300 de hp. Derrotando Bragrumol, podemos seguir para o próximo.

Xogixath
Siga agora para o noroeste de Issavi, até uma tumba (aqui![]() ) que é acessada por um Ancient Sepulchre. Ao entrar na sala, você irá encontrar o boss Xogixath acompanhado de: 02 Crypt Wardens e 01 Sphinx.
) que é acessada por um Ancient Sepulchre. Ao entrar na sala, você irá encontrar o boss Xogixath acompanhado de: 02 Crypt Wardens e 01 Sphinx.

Derrotando os três bosses, retorne a Alyxo e reporte o sucesso de sua missão falando Hi - Mission.
Reportando a missão
|
Jogador: Hi
Alyxo: Greetings, dear art lover! Welcome to the Seaside Theatre! |
Ela ficará satisfeita, porém diz que ainda temos trabalho a ser feito. Ela então pede novamente nossa ajuda com três tarefas que podem ser realizadas em qualquer ordem:
- Matar 300 membros do culto a Fafnar que são os Burning Gladiators e as Priestess Of The Wild Sun;
- Ajudá-la a encontrar sua Lira, a Ivory Lyre
 que foi roubada;
 - Ajudá-la a encontrar um animal, para que ela o petrifique e o dê de presente para a sua amada, a NPC Narsai.
Killing 300 Fafnar Cultists

| Nota: Caso realize esta task em grupo, será necessário que cada jogador cause o maior dano nas criaturas para que morte da criatura |
A missão é um tanto quanto difícil se for sozinho, pois essas criaturas sempre estão acompanhadas, em grupo a tarefa se torna mais fácil e menos perigosa. O melhor local é próximo a Alyxo, no buraco da esquerda (aqui![]() ), que nos leva aos bueiros da cidade de Issavi. Matando os 300 cultistas, reporte a missão para Alyxo falando Hi - Fafnar Cultists - Yes.
), que nos leva aos bueiros da cidade de Issavi. Matando os 300 cultistas, reporte a missão para Alyxo falando Hi - Fafnar Cultists - Yes.
Reportando a missão
|
Ivory Lyre![]()
Notas:
|
Sabemos que a Ivory Lyre foi roubada, e conhecemos apenas um ladrão em toda Issavi, vá até Moe e pergunte sobre a lira falando Hi - Lyre, ele ficará chateado por acusá-lo e meio a contra gosto dirá que a lira está escondida em uma tumba a oeste da cidade.
Falando com Moe
|
Jogador: Hi
Moe: Greetings, traveller. It seems, you're a guest here, just like me. |
A lira está escondida em uma tumba a oeste da cidade (aqui![]() ), chegando lá desça no Ancient Sepulchre, o local tem alguns Crypt Wardens e Sphinxs, procure por um buraco escondido no norte da tumba (aqui
), chegando lá desça no Ancient Sepulchre, o local tem alguns Crypt Wardens e Sphinxs, procure por um buraco escondido no norte da tumba (aqui![]() ) e desça. No local haverá uma sala com uma porta selada, caso não tenha falado com Moe, ela não irá abrir, portanto fale com ele antes de ir até lá. Abrindo a porta a Ivory Lyre estará dentro de uma Bag que está no chão, use a bag para pegar a Lira. Com ela em mãos, reporte o seu progresso para Alyxo falando Hi - Lyre.
) e desça. No local haverá uma sala com uma porta selada, caso não tenha falado com Moe, ela não irá abrir, portanto fale com ele antes de ir até lá. Abrindo a porta a Ivory Lyre estará dentro de uma Bag que está no chão, use a bag para pegar a Lira. Com ela em mãos, reporte o seu progresso para Alyxo falando Hi - Lyre.
Reportando a missão
|
A Gift for Narsai
Para essa missão iremos precisar de uma Net (Ferramenta), comprada em lojas de ferramentas para podermos "pescar" e capturar alguns animais e entregar a ela como possível presente para sua amada. Usando a rede (Net) na água, poderemos pegar 1 Calamary (Item) ou 1 Small Tortoise. A small tortoise também podemos pegar em um ninho (aqui![]() ), e também é um loot raro de Goannas.
), e também é um loot raro de Goannas.
Reportando a missão
|
| Nota: Quando entregamos para ela a Small Tortoises avançamos na missão, caso entregue uma segunda Small Tortoise para ela (dizendo "Small Tortoise"), ela irá petrificá-la e te dará como presente uma Small Petrified Tortoise |
Sunray Emblem![]()
Após entregar todas as missões para Alyxo, fale Hi - Mission - Yes para receber o Sunray Emblem, uma das 4 partes necessárias para montarmos o The Regalia of Suon.
Reportando a missão
|
Jogador: Hi
Alyxo: Greetings, dear art lover! Welcome to the Seaside Theatre! |
Finalizando a missão The Boards that Mean the World.

|
|
|
|
The Revenge of the Ogres
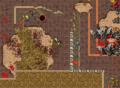
| Atenção: A partir de agora o spoiler combina duas quests: a Grave Danger Quest e a Kilmaresh Quest. Durante o spoiler, avisos irão indicar quais partes pertencem a cada quest. |
Esse local é de difícil acesso, devido aos testes e principalmente a quantidade de monstros encontradas no local.
Procure pela NPC Saideh ao sul de Kilmaresh (aqui![]() ).
).
Caminho:
|
Fale Hi - Mission com Saideh, ela pedirá ajuda para recuperar os restos mortais de um grande herói chamado Dayyan, ele está na tumba porém o local está tomado pelos Ogros, mas não são os Ogros que conhecemos em Krailos, são bem mais fortes, como o Ogre Ruffian, Ogre Sage e Ogre Rowdy o que dificulta o trabalho.
Falando com Saideh
 |
Jogador: hi
Saideh: Hello, my name is Saideh. Once this was the entry of the crypt of our heroes. One of the graves belongs to our beloved hero Dayyan. Nowdays it is not a good idea to visit this place... |
Ao passar pela porta, cuidado pois há de fato muitos Ogros no local, o ideal é ir com um time.
Siga a norte e desça as escadas (aqui![]() ). O seu objetivo é pegar a Wooden Cage Key
). O seu objetivo é pegar a Wooden Cage Key ![]() , (aqui
, (aqui![]() ), que nos abrirá uma porta que dá acesso á tumba.
), que nos abrirá uma porta que dá acesso á tumba.

Local da Key

Com a chave em mãos siga para sudeste, sempre com cuidado, até encontrar uma porta, (aqui![]() ), use a Wooden Cage Key. Após isso a chave irá sumir (ou seja cada jogador terá que usar a sua própria key).
), use a Wooden Cage Key. Após isso a chave irá sumir (ou seja cada jogador terá que usar a sua própria key).

Desça a única escada do local e chegaremos na tumba onde passaremos pelos Puzzles.
Teste 1 - What is your vocation?
Esse teste é o mais fácil do local. Basta entrar no teleport que tem o item correspondente a sua vocação, conforme imagem abaixo:
| Atenção: Caso você erre o primeiro Teste, será jogado para fora da caverna, no meio das criaturas e próximo á cachoeira. |

Teste 2 - Trails of Blaze
Ao passar o primeiro teste você estará em outra sala. Nesse teste teremos que passar no portal correspondente ao número de Coal Basins ![]() acesos:
acesos:
- Todos Coal Basins apagados = Teleport 1
- 01 Coal Basin aceso = Teleport 2
- 02 Coal Basins acesos = Teleport 3
- Todos Coal Basins acesos = Teleport 4
| Nota: Caso erre aqui, você voltará para a sala do Teste 1. |

Teste 3 - Mummies in the Dark
Ao fazer tudo corretamente, você estará no próximo teste, que é um pouco menos complicado mas requer atenção.
Você deverá entrar em um dos 4 teleports de acordo com a cor do piso (preto), quando qualquer uma das 2 Mummys estiverem pisando.
Veja um exemplo na imagem abaixo, onde nesse caso seria possível passar pelo teleport 2 ou o 4.
| Nota: Caso erre aqui, você voltará para a sala do Teste 1. |

Teste 4 - Pathway of Ever Changing Knowledge
Ao fazer tudo corretamente, você estará no próximo teste, que requer agilidade e boa memória (ou então um outro jogador para ficar te ajudando).
Há na sala uma sequência de pisos ao sul que ficam se alternando a cada 7-8 segundos.
Funciona da seguinte maneira: a ordem que está embaixo é a ordem que você terá que pisar para avançar no caminho de cima.
| Nota: Caso erre aqui, você voltará para a sala do Teste 1. |
Temos como exemplo a foto a seguir:

Nesse caso o jogador teria que passar conforme mostra a linha desenhada para conseguir chegar ao fim, porém esse trajeto é quase impossível de se fazer dentro do tempo, neste caso sugerimos algumas opções:
- O jogador irá aguardar uma sequência fácil de seguir, ou seja, quase em linha reta, passando de uma vez.
- O jogador passa a primeira, e espera na sequência uma ordem mais fácil de passar as 3 seguintes.
- O jogador pede para um amigo ir falando a ordem para ele.
Passando este teste abra a porta a sua esquerda e tome cuidado com as criaturas do local, Black Sphinx Acolyte, Priestess Of The Wild Sun e Burning Gladiators. Logo ao norte, (aqui![]() ) haverá uma outra porta, abra para liberar o atalho e não precisar mais passar por esses 4 testes (apenas abra e volte).
) haverá uma outra porta, abra para liberar o atalho e não precisar mais passar por esses 4 testes (apenas abra e volte).
Na sala você achará um túmulo com dois Scorpions (um de cada lado), clique do lado ESQUERDO do túmulo, pois o direito irá lhe dar um dano de fogo referente a metade de seu hp. Ao clicar no túmulo correto, descobriremos que está vazio.

Jogador clicando do lado errado.

Jogador clicando no local correto.


| Atenção: A partir deste ponto a missão da Kilmaresh Quest está concluída e o spoiler continua com a missão da Grave Danger Quest. Caso só esteja aqui devido a Kilmaresh Quest, reporte sua missão agora para a NPC Saideh. |
Teste 5 - The More You See the Less You Fear
Esse teste provavelmente será o que o jogador mais erre. Aqui você tem que ver qual piso tem mais e entrar no teleport correspondente (conforme foto abaixo).
Os pisos mudam de posição a cada 10 segundos, logo o jogador não terá tempo de contar todos os pisos, então terá que "deduzir" por sua conta qual tem mais. Uma dica é tentar entrar sempre pelo piso de madeira ou o piso preto, pois se destacam dos demais.
Passando por esse teste corretamente, abra a porta ao norte para destrancá-la e depois siga ao sul e estaremos no último teste.
| Nota: Caso erre aqui, você voltará para a sala do Teste 1. Mas agora você poderá entrar pela porta ao norte que destrancamos no Teste anterior, não havendo necessidade então de passar novamente por todos eles. |

Teste 6 - The Labyrinth of Ancient Melody
Esse teste é o mais fácil, basta pisar em todos os pisos brilhantes na ordem correta, fazendo com que apareça uma nota musical VERDE.
Você deverá pisar uma única vez em cada piso, caso pise duas vezes em um piso ou no piso errado, notas musicais VERMELHAS irão aparecer, fizemos um mapa do qual você irá passar apenas uma vez em cada sqm, ficando fácil de resolver.
No lado esquerdo do labirinto existe uma alavanca, puxe-a se precisar "resetar" o seu processo.
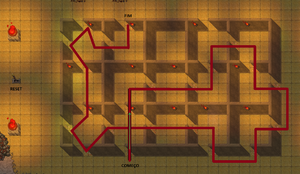
Siga a linha vermelha do "Começo" ao "Fim" e entre na porta ao norte.

Se você chegar ao final e conseguir usar a porta, significa que você fez tudo certo e basta continuar a quest, caso contrário "resete" os sqms puxando a alavanca e passe pelos pisos brilhantes novamente.
Passando pela porta selada, haverá uma outra porta a direita, (aqui![]() ) que libera acesso fácil a este local e uma escada que te leva ao andar inferior do Kilmaresh Puzzle.
) que libera acesso fácil a este local e uma escada que te leva ao andar inferior do Kilmaresh Puzzle.
Desça as escadas e apenas siga para o norte onde haverá uma última passagem, (aqui![]() ), passe por ela e você estará em uma sala onde estará o túmulo, use o Vial of Potent Holy Water
), passe por ela e você estará em uma sala onde estará o túmulo, use o Vial of Potent Holy Water ![]() , abençoando o túmulo e impedindo que a "Legião" leve esse Lich-knight.
, abençoando o túmulo e impedindo que a "Legião" leve esse Lich-knight.

Finalizando a parte da Grave Danger

| Atenção: A partir deste ponto a missão da Grave Danger Quest está concluída e temos como complemento as falas com a NPC Saideh para poder finalizar a parte da Kilmaresh Quest. |
Volte a NPC Saideh para reportar a sua missão, falando Hi - Mission, e receba 20k de experiência e o Golden Bijou ![]() , uma das 4 partes necessárias para montarmos o The Regalia of Suon.
, uma das 4 partes necessárias para montarmos o The Regalia of Suon.
Reportando a missão
|
Jogador: hi
Saideh: Hello, my name is Saideh. Once this was the entry of the crypt of our heroes. One of the graves belongs to our beloved hero Dayyan. Nowdays it is not a good idea to visit this place... |
Finalizando a missão The Revenge of the Ogres.

|
|
|
|
Wanted
Para iniciar esta missão, vá até Eshaya, (aqui![]() ) e fale Hi - Wanted - Yes. Ele nos contará que há quatro indivíduos que são procurados pela Sapphire Blade (grupo do qual Eshaya é líder). Ele pede nossa ajuda para capturá-los, ao aceitar a missão ele nos avisa que um dos quatro procurados pode ser inocente. Para descobrirmos quem é, devemos conversar com a Kallimae, ela fica nos jardins suspensos, (aqui
) e fale Hi - Wanted - Yes. Ele nos contará que há quatro indivíduos que são procurados pela Sapphire Blade (grupo do qual Eshaya é líder). Ele pede nossa ajuda para capturá-los, ao aceitar a missão ele nos avisa que um dos quatro procurados pode ser inocente. Para descobrirmos quem é, devemos conversar com a Kallimae, ela fica nos jardins suspensos, (aqui![]() ).
).
Falando com Eshaya
|
Jogador: Hi
Eshaya: Suon's and Bastesh's blessing, dear guest! |
Vá até Kallimae, (aqui![]() ), e fale Hi - Wanted. Ela nos contará de suas visões e como podemos obter a mesma capacidade de clarividência para ver o que aconteceu no passado, para isso devemos obter um Golden Hand Mirror
), e fale Hi - Wanted. Ela nos contará de suas visões e como podemos obter a mesma capacidade de clarividência para ver o que aconteceu no passado, para isso devemos obter um Golden Hand Mirror ![]() e uma Ivory Mask
e uma Ivory Mask ![]()
Falando com Kallimae
|
Jogador: Hi
Kallimae: Suon's and Bastesh's blessing, dear guest! |
Ivory Mask ![]()
| Nota: Caso você ainda tenha guardado a Ivory Mask, pega durante a Fafnar's Wrath, você não precisa pegar uma nova. |
Para obter a Ivory Mask ![]() vá até a biblioteca do palácio (aqui
vá até a biblioteca do palácio (aqui![]() ), note que existem vários Sun Mosaics e Wave Mosaics, mas somente um Ankh Mosaic. Use uma Small Emerald no piso com o desenho de um Ankh e você encontrará a máscara.
), note que existem vários Sun Mosaics e Wave Mosaics, mas somente um Ankh Mosaic. Use uma Small Emerald no piso com o desenho de um Ankh e você encontrará a máscara.
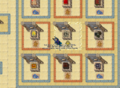
Obtendo a Ivory Mask.

Golden Hand Mirror ![]()
Para obter o Golden Hand Mirror ![]() vá até as Ruínas de Nuur (aqui
vá até as Ruínas de Nuur (aqui![]() ). No caminho, além de enfrentar praticamente todas as criaturas de Kilmaresh, enfrentaremos os Girtablilus, seres metade homem metade escorpião que não hesitarão em eliminar qualquer um que invada seus domínios, portanto tome cuidado. O espelho dourado está dentro de uma caixa
). No caminho, além de enfrentar praticamente todas as criaturas de Kilmaresh, enfrentaremos os Girtablilus, seres metade homem metade escorpião que não hesitarão em eliminar qualquer um que invada seus domínios, portanto tome cuidado. O espelho dourado está dentro de uma caixa ![]() localizada (aqui
localizada (aqui![]() ).
).
Entrada das Ruínas de Nuur.
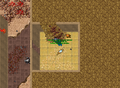
Obtendo o Golden Hand Mirror.


Com os dois itens em mãos, devemos escurecer o espelho com fuligem, para isso bastar usar o espelho em qualquer Lit Wall Lamp ![]() ou Fire Bowl
ou Fire Bowl  , você obterá um Blackened Hand Mirror
 ![]() . Feito isto, vá ao santuário do deus Suon localizado em Nykri Delta (aqui
. Feito isto, vá ao santuário do deus Suon localizado em Nykri Delta (aqui![]() ), suba as escadas do santuário, equipe a máscara e use algum equipamento (Kitchen Knives
), suba as escadas do santuário, equipe a máscara e use algum equipamento (Kitchen Knives ![]() , Obsidian Knives
, Obsidian Knives ![]() ou canivetes
ou canivetes ![]()
![]()
![]() ) para retirar a fuligem do espelho.
) para retirar a fuligem do espelho.
| Nota: A NPC Taya fica no santuário de Suon, caso não tenha feito ainda, aproveite para iniciar a missão Aspiring Oracle com ela falando Hi - Oracle - Yes. |
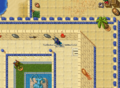
Sujando o Golden Hand Mirror com fuligem de uma Lit Wall Lamp.
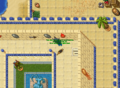
Obtendo o Blackened Hand Mirror.
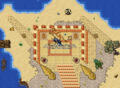
Realizando o ritual no santuário de Suon.


Você receberá uma mensagem informando que dos quatro procurados, Petaris é inocente. Volte para a cidade e reporte a missão para Eshaya falando Hi - Wanted. Ele ficará feliz em saber quem é o inocente e pedirá que você encontre os outros três e faça a justiça. Os três procurados restantes são: Amenef The Burning, Neferi The Spy e Sister Hetai.
Reportando a missão
|
Agora que sabemos quem são os verdadeiros criminosos, devemos encontrar seus esconderijos e enfrentá-los.
Amenef The Burning se esconde dentro das ruínas de Nuur, Neferi The Spy se esconde à vista de todos na própria cidade de Issavi e por fim Sister Hetai comanda os cultistas de Fafnar em sua batalha contra os Anuma nas Kilmaresh Catacombs.
Nota:
|
|
|
|


Após matar os três cultistas, volte até Eshaya e reporte a missão falando Hi - Wanted.
Reportando a missão
|
Ao reportar a missão para Eshaya, ele irá agradecê-lo por livrar Issavi desta ameaça e como forma de gratidão irá lhe presentear com o Citizen of Issavi Outfit.
Citizen of Issavi Outfits
Male/Female:


|
|
|
|
Extras
Nykri River Shortcuts
Ao completar todas as missões da Kilmaresh Quest (Fafnar's Wrath, Midnight Rituals, The Boards that Mean the World, The Revenge of the Ogres, A Shark in Need, Aspiring Oracle e Wanted) você será capaz de usar dois atalhos de barco que levam para Southern Steppe / Ruins of Nuur e Green Belt / Salt Caves.
 |
Atalho para Southern Steppe / Ruins of Nuur
|
 |
Atalho para Green Belt / Salt Caves
|
Gryphon Mount
Completando as 4 missões principais (Fafnar's Wrath, Midnight Rituals, The Boards that Mean the World e The Revenge of the Ogres) você terá juntado cada um dos itens: ![]() ,
, ![]() ,
, ![]() e
e ![]() . Com eles em mãos siga para o NPC Yonan que é o joalheiro da cidade, fale com ele sobre "The Regalia of Suon" e ele irá criar o The Regalia of Suon
. Com eles em mãos siga para o NPC Yonan que é o joalheiro da cidade, fale com ele sobre "The Regalia of Suon" e ele irá criar o The Regalia of Suon ![]() para você. Esse item juntamente com a Gryphon Mask
para você. Esse item juntamente com a Gryphon Mask ![]() serão necessários para domarmos o Gryphon.
serão necessários para domarmos o Gryphon.
Montaria:

Parabéns, você concluiu a quest!
Para addons do outfit, confira outros spoilers:
- Addons 1 & 2: Citizen of Issavi Outfits Quest.